Setup Guide
1. Dashboard Overview
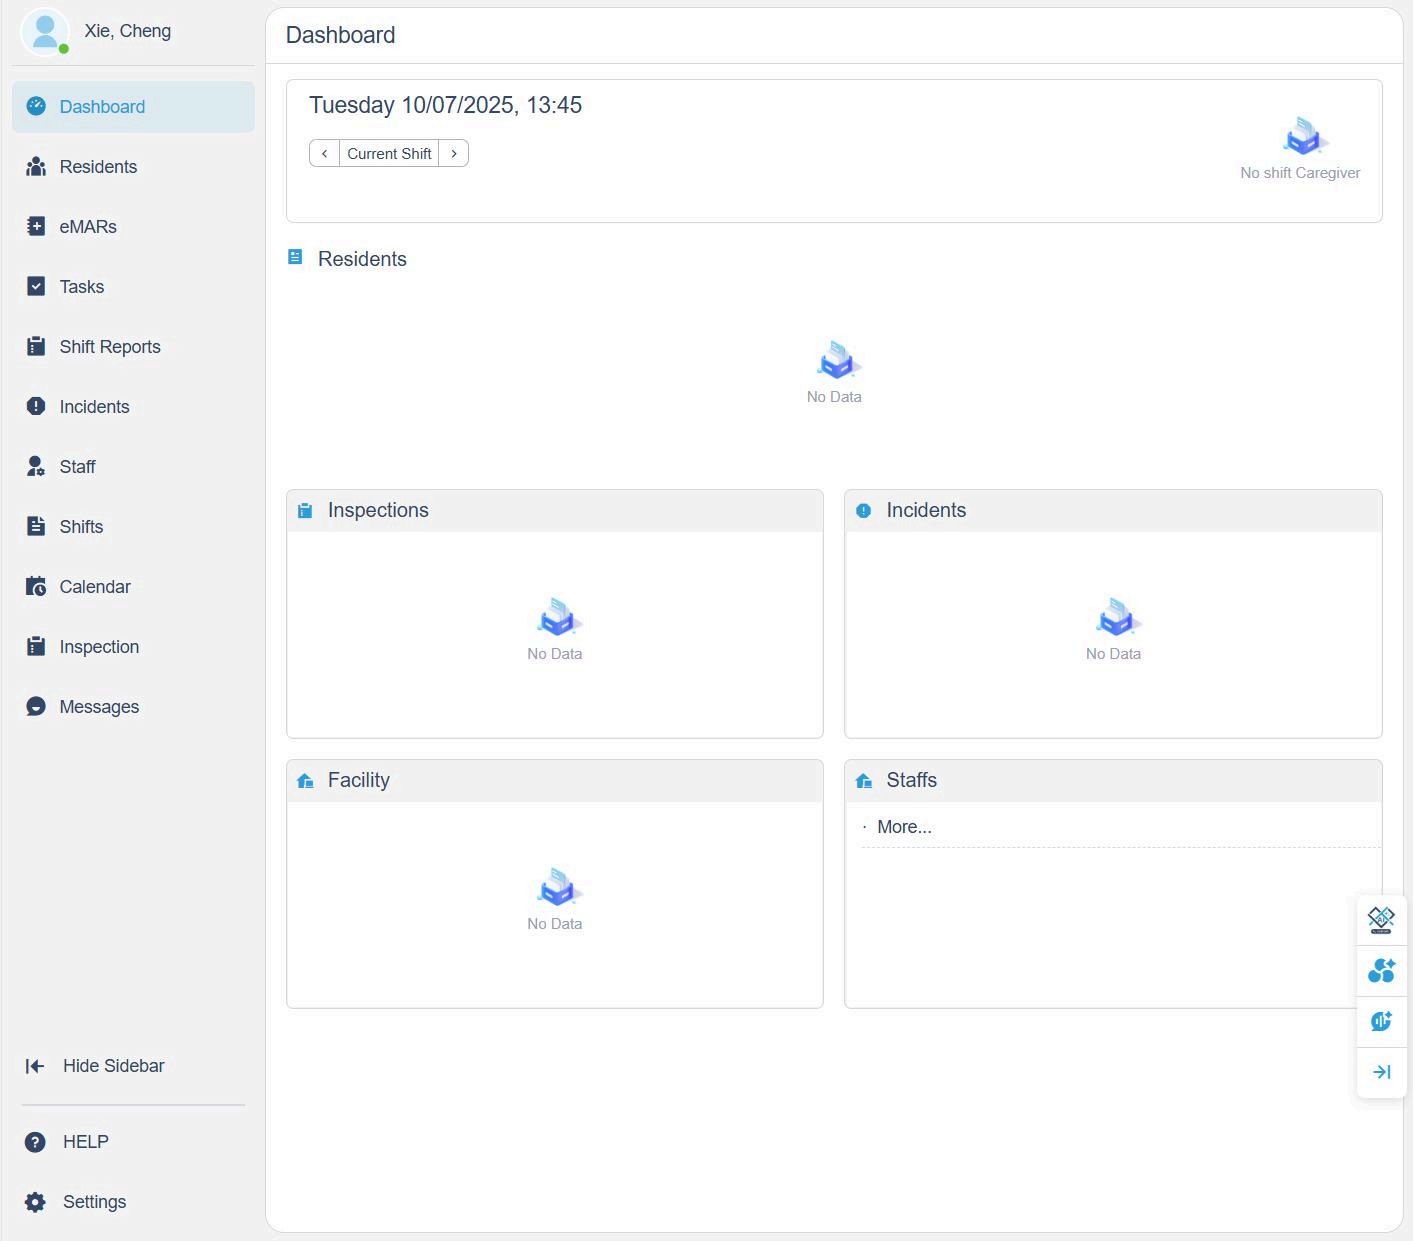
When you log in to your new LTLinx account, your dashboard will initially appear empty, showing no data yet under Residents, Inspections, Incidents, Facility, and Staff.
Start your setup by clicking Residents on the left sidebar.
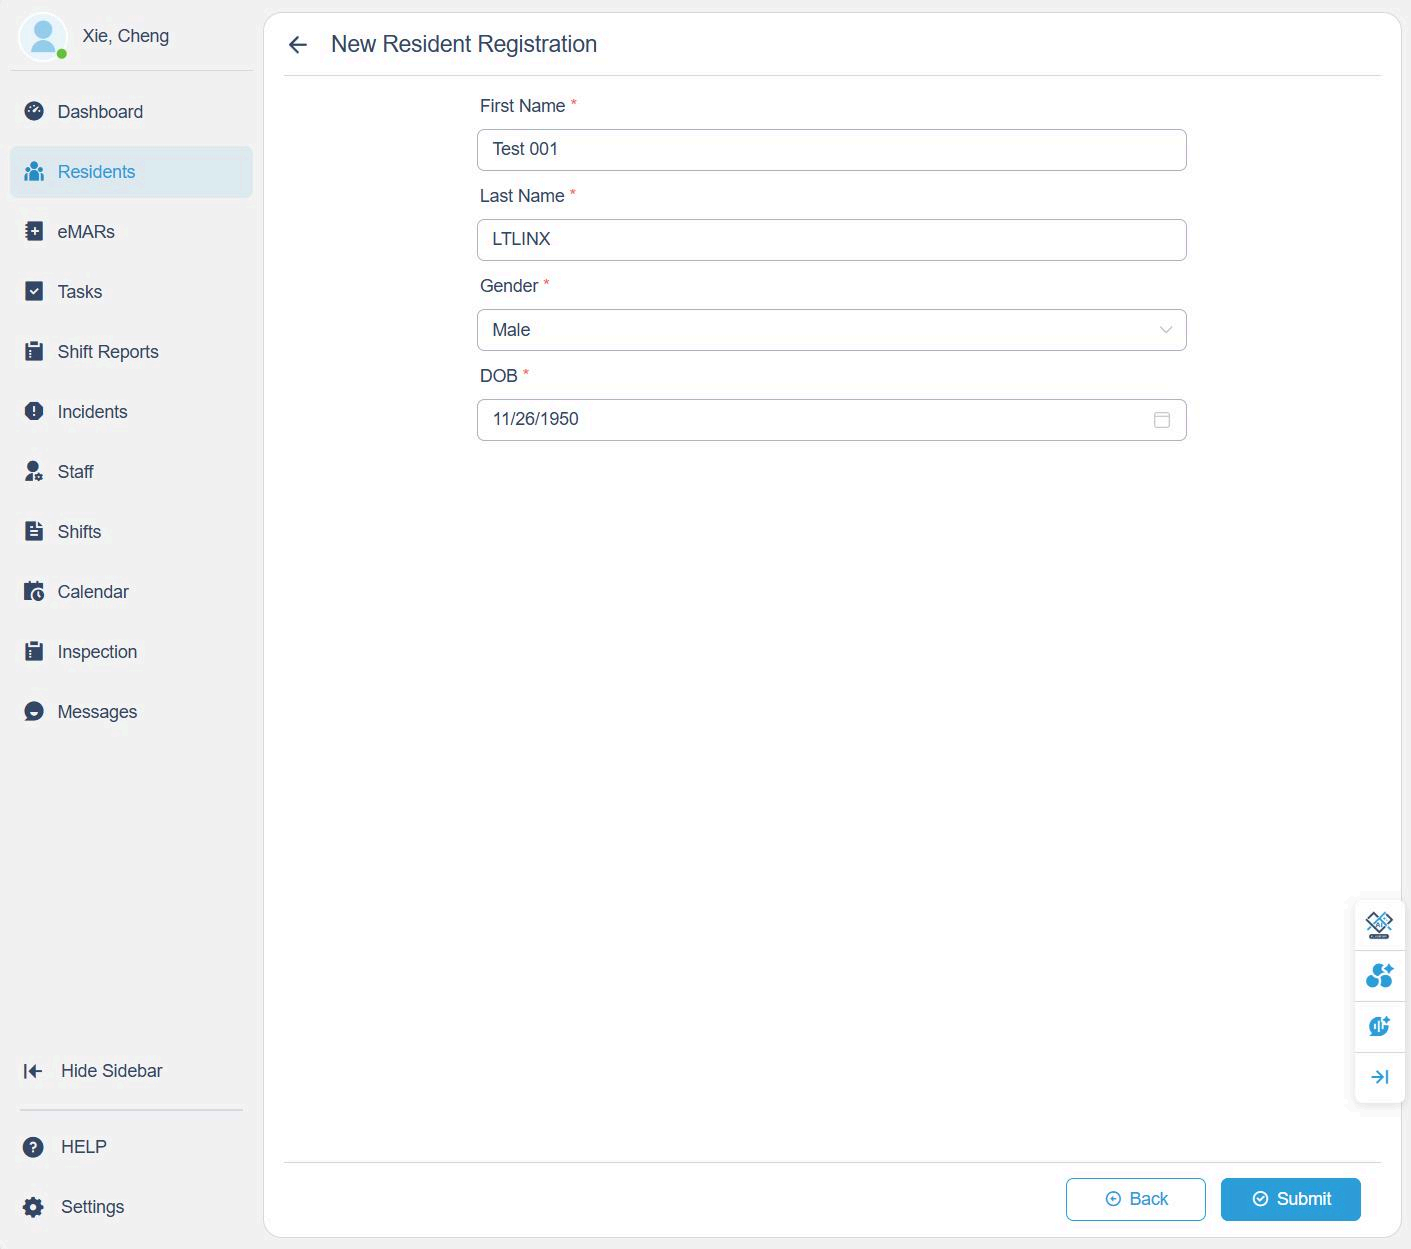
2. Add a New Resident
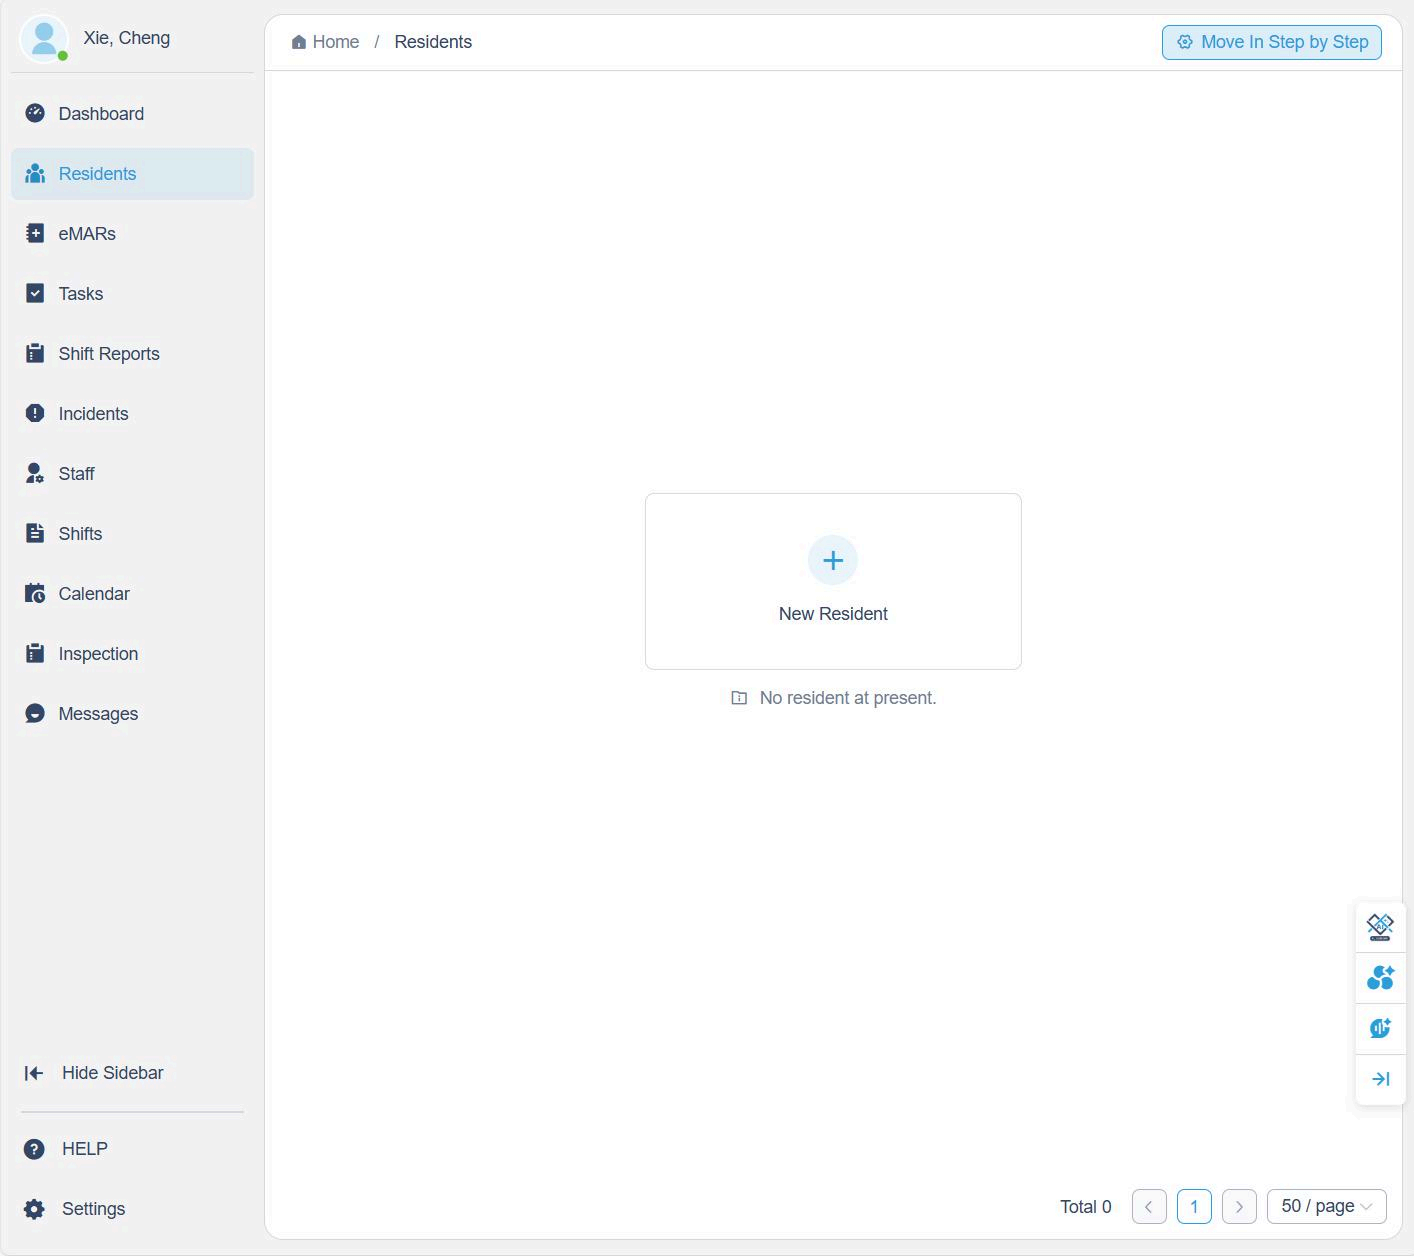
- Click Residents on the sidebar.
- Select + New Resident.
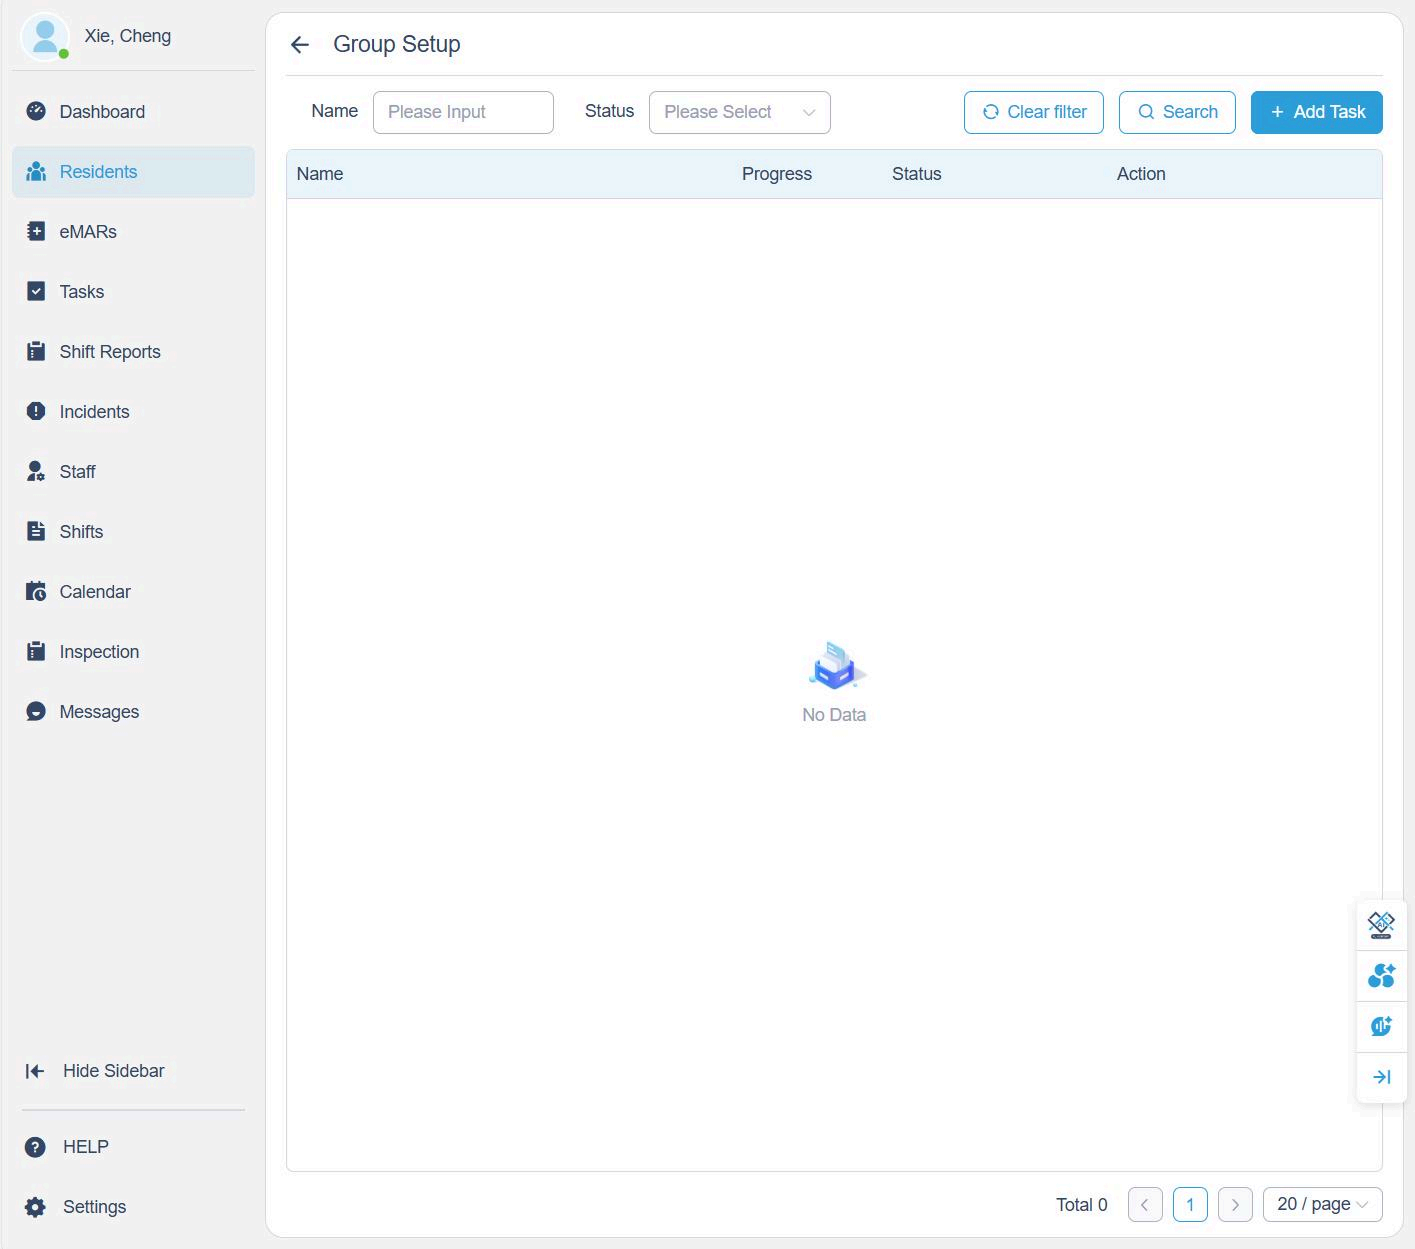
- Then click +Add task.
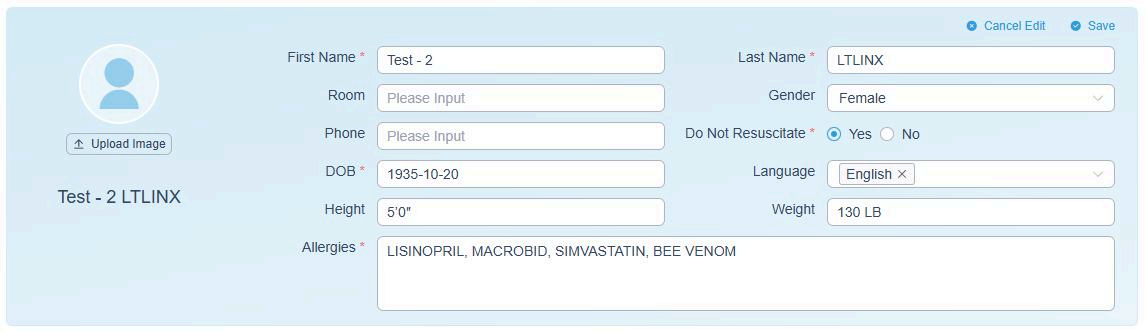
- Fill in the resident's information:
- First Name
- Last Name
- Gender
- Click Submit to continue.
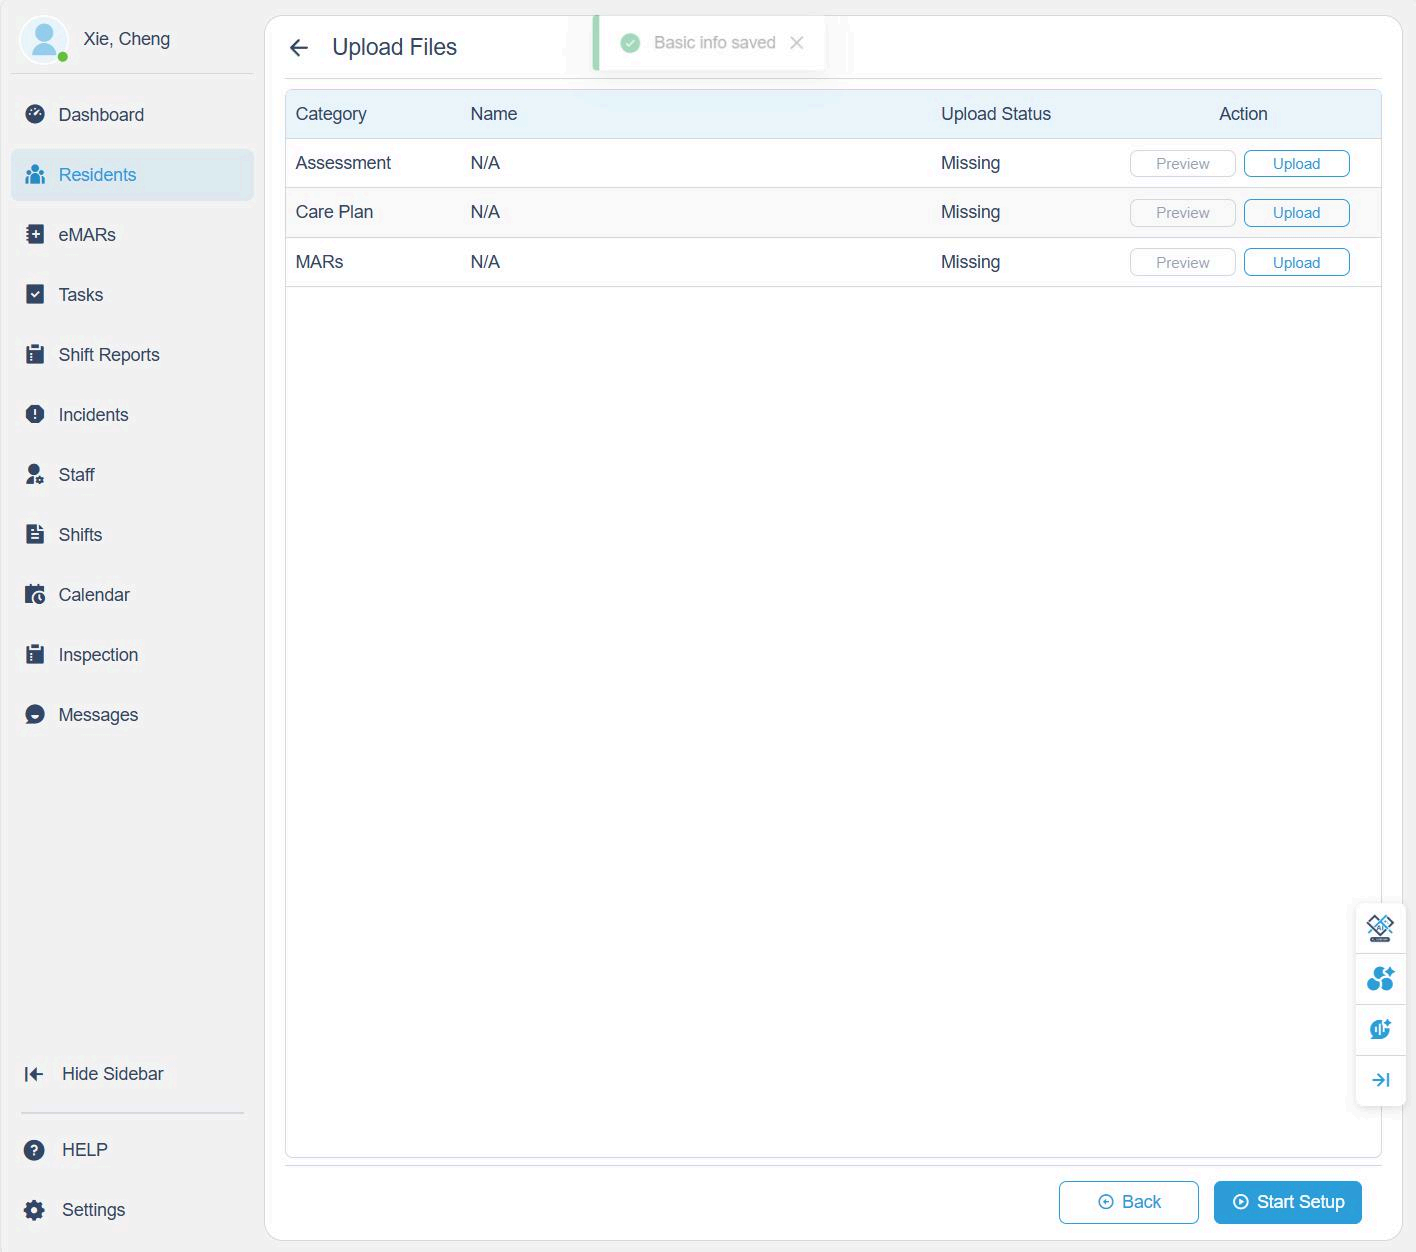
3. Upload Resident Documents
After creating the resident profile, upload the required documents:
- Assessment
- Care Plan
- MARs (Medication Administration Records)
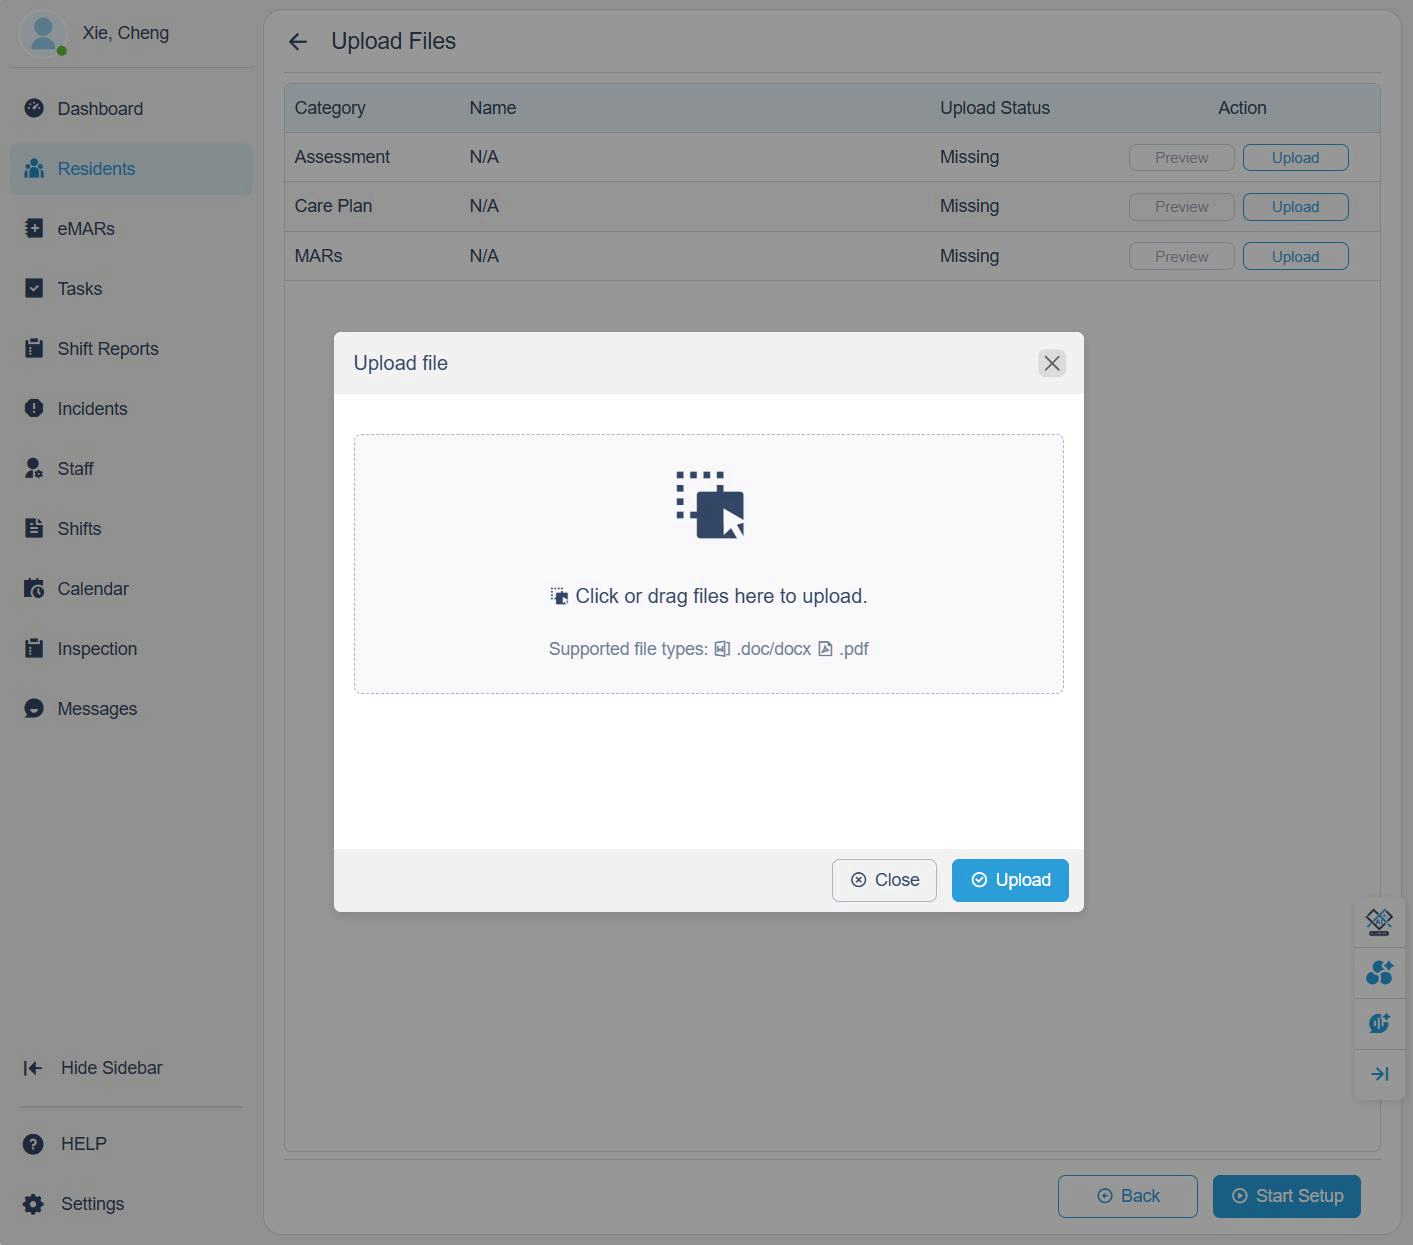
Click Upload beside each category and drag or select the file (PDF, DOCX). Once files are uploaded, click Continue.
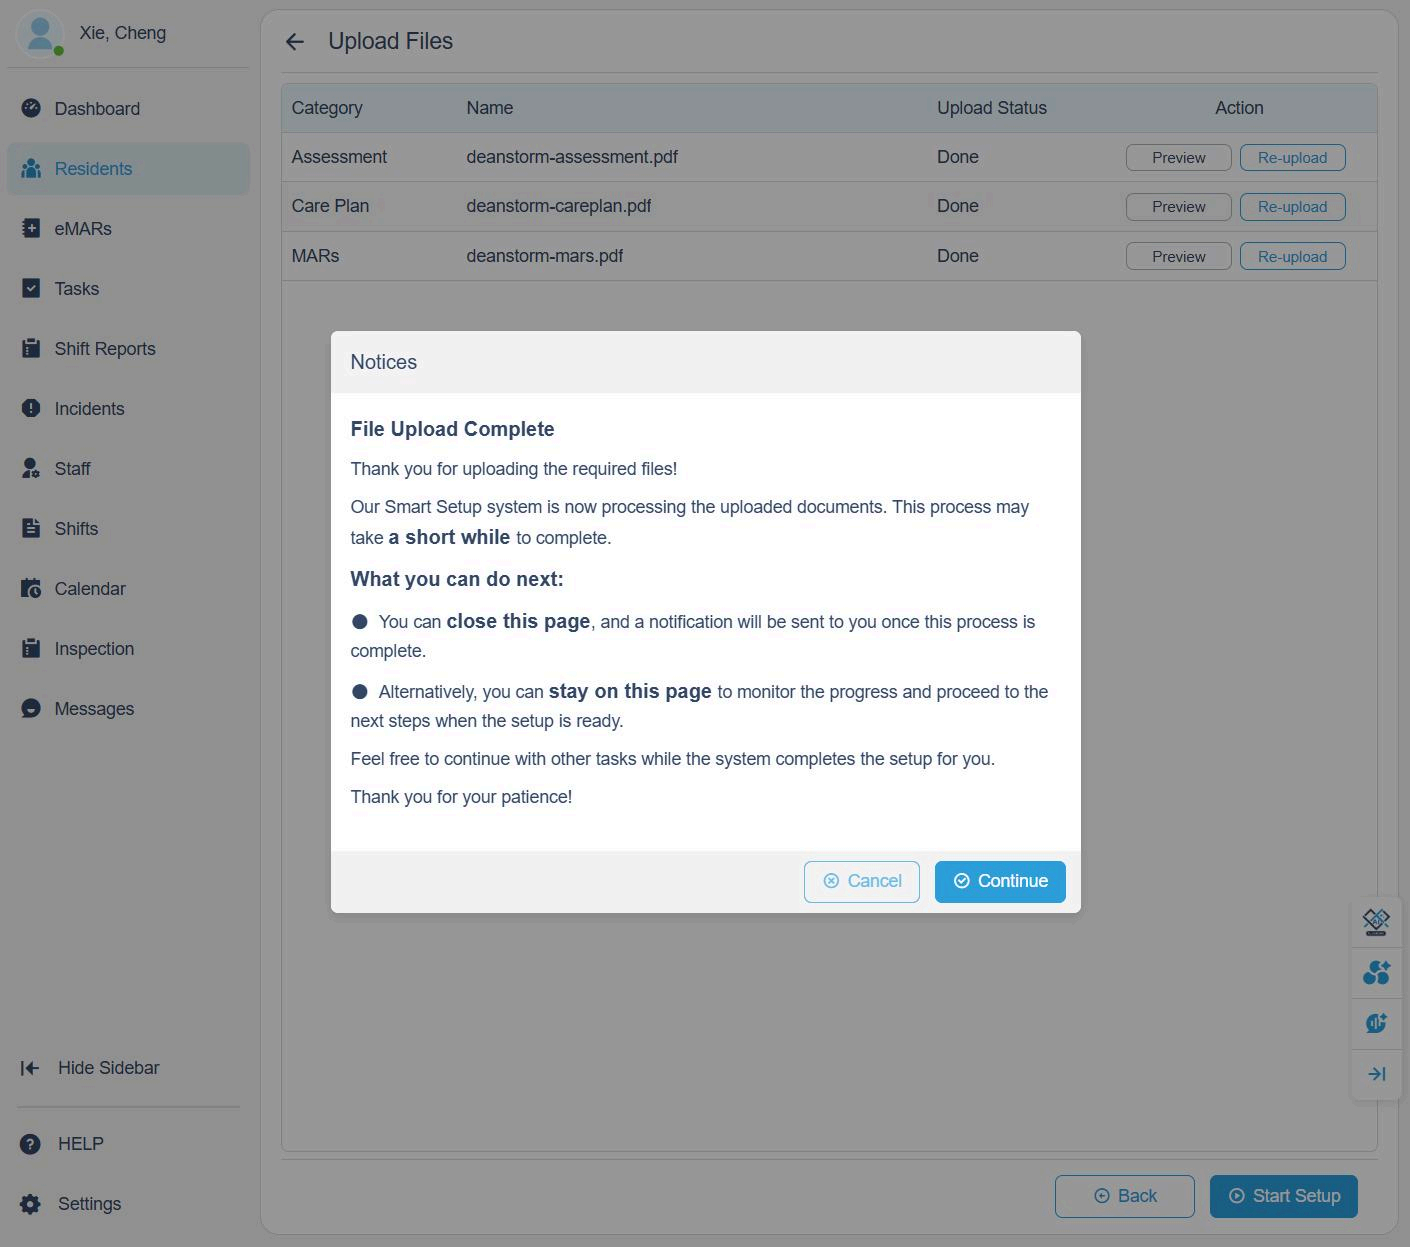
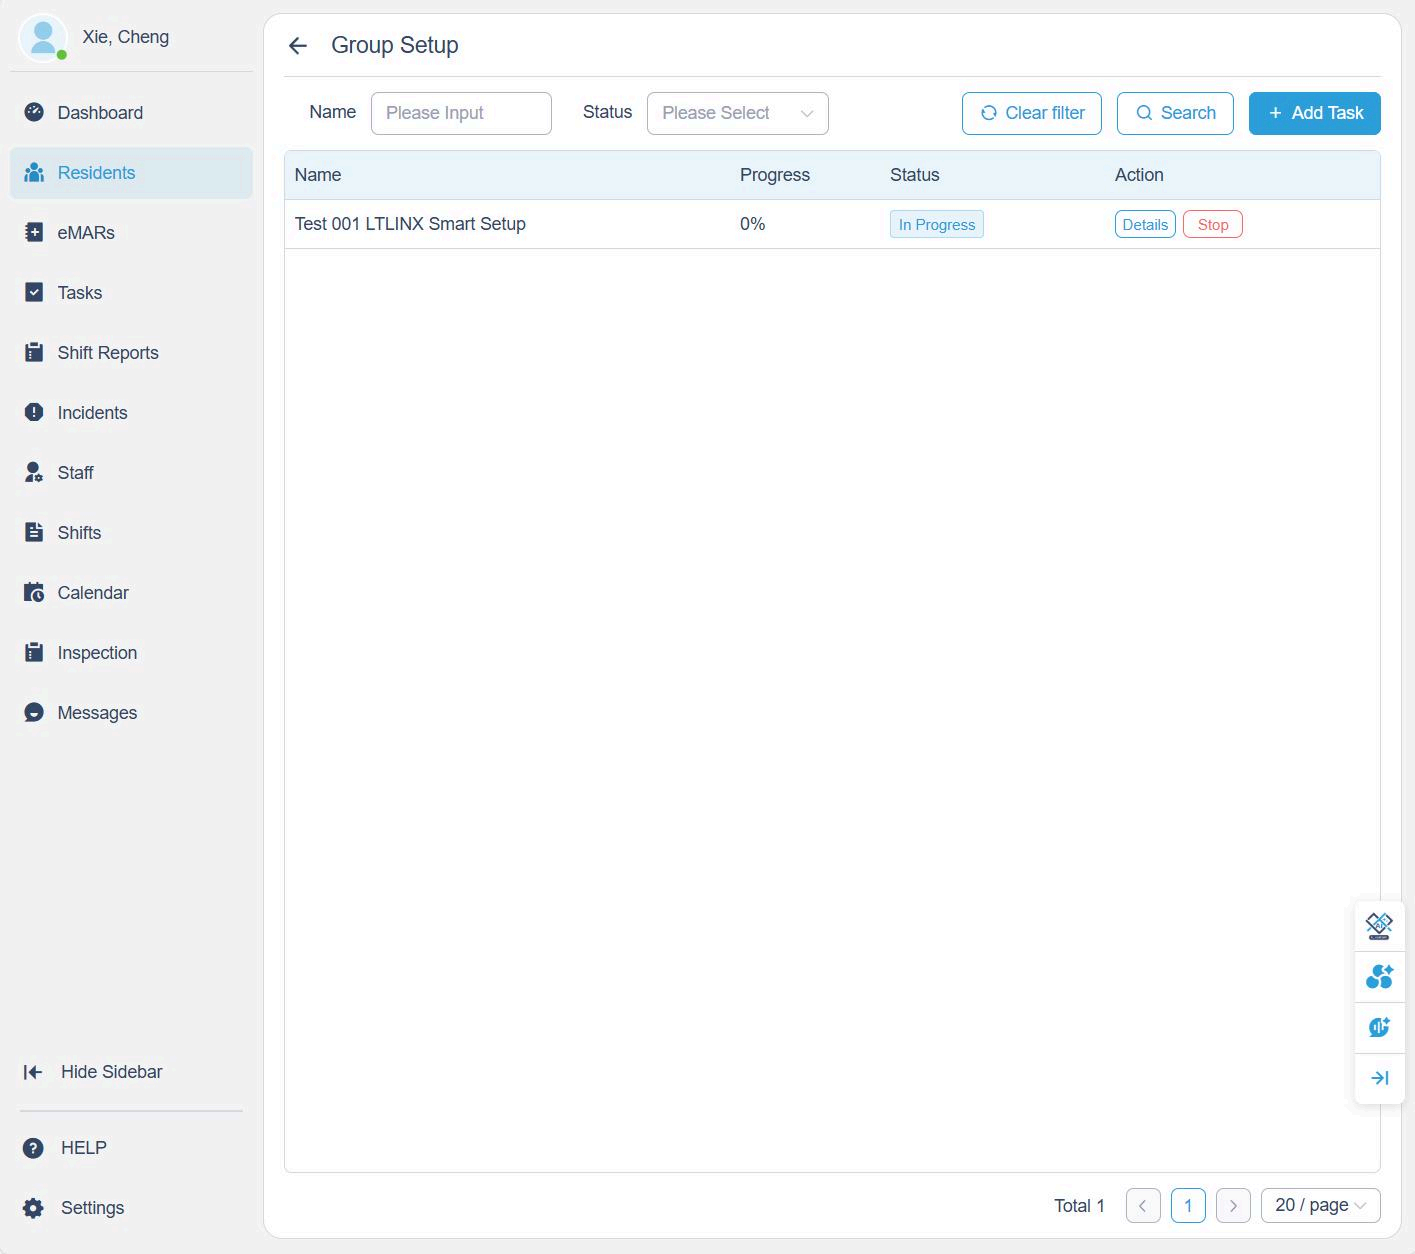
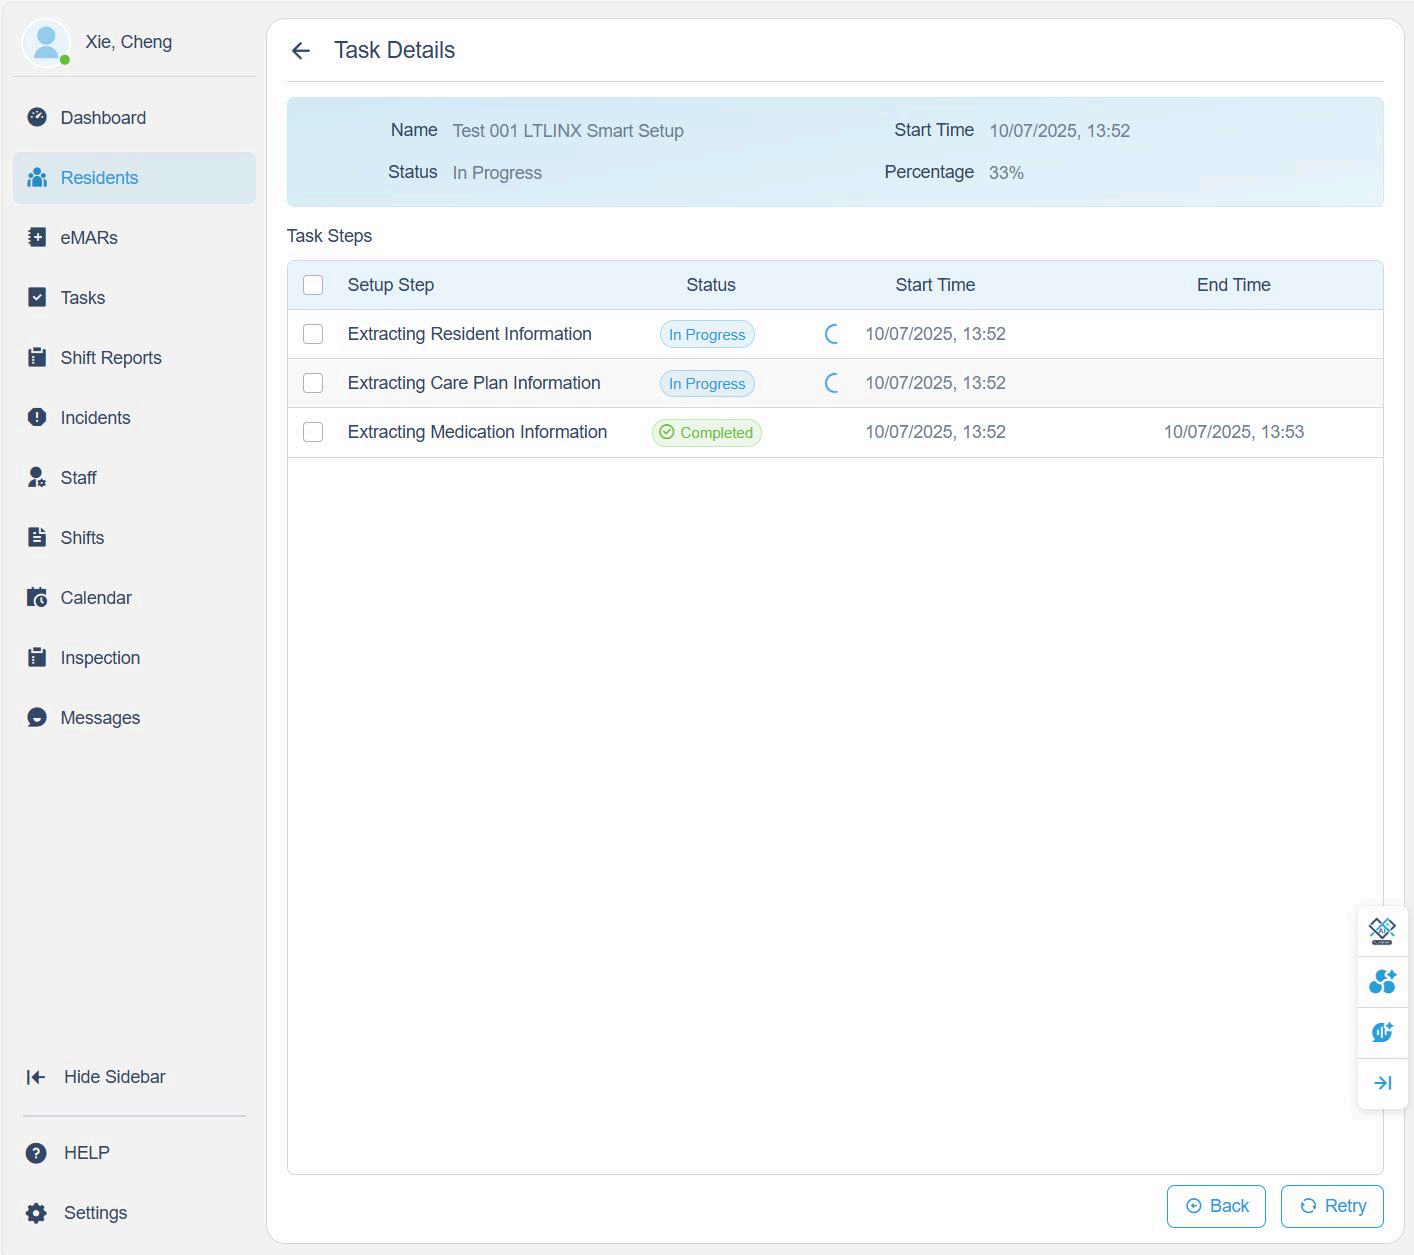
4. Smart Setup Progress
- Once all documents were uploaded then you can click Details to view Smart Setup progress.
- The system will automatically extract information from your uploaded files.
- If the AI setup shows Failed, click Retry to restart the process.
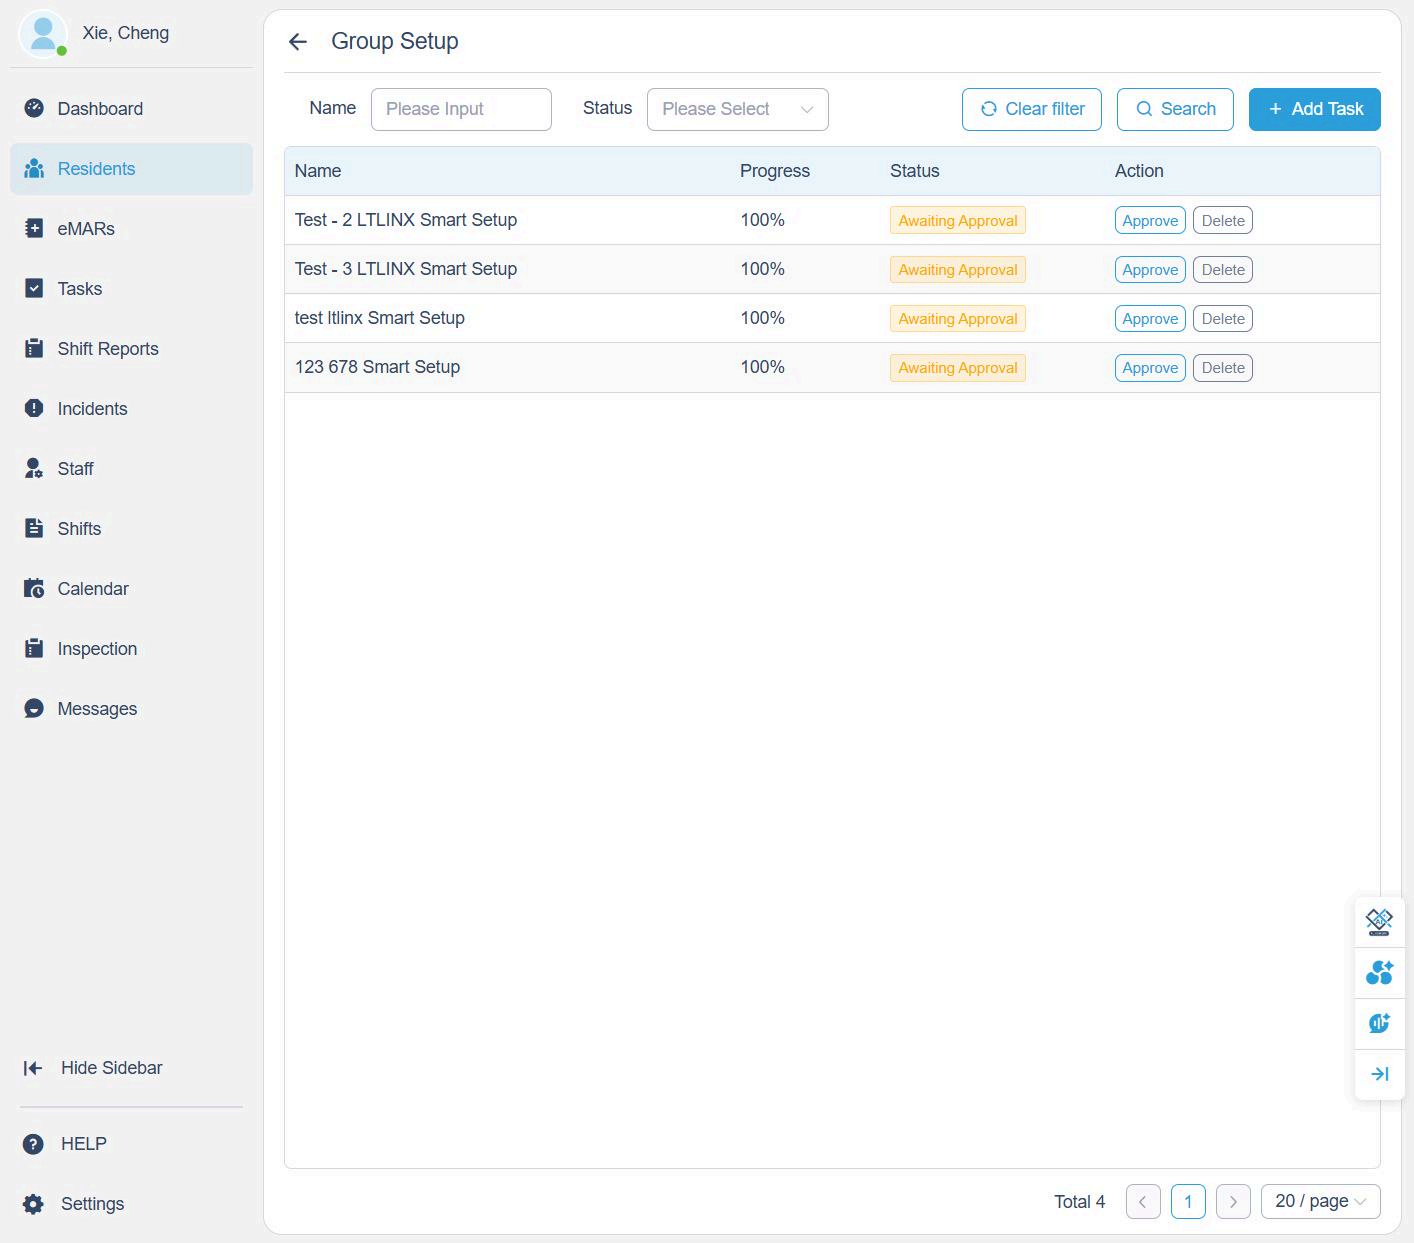
When extraction is complete:
- Click Back to return to the setup page.
- The status will display Awaiting Approval.
- You may also click + Add Task to run multiple resident setups simultaneously.
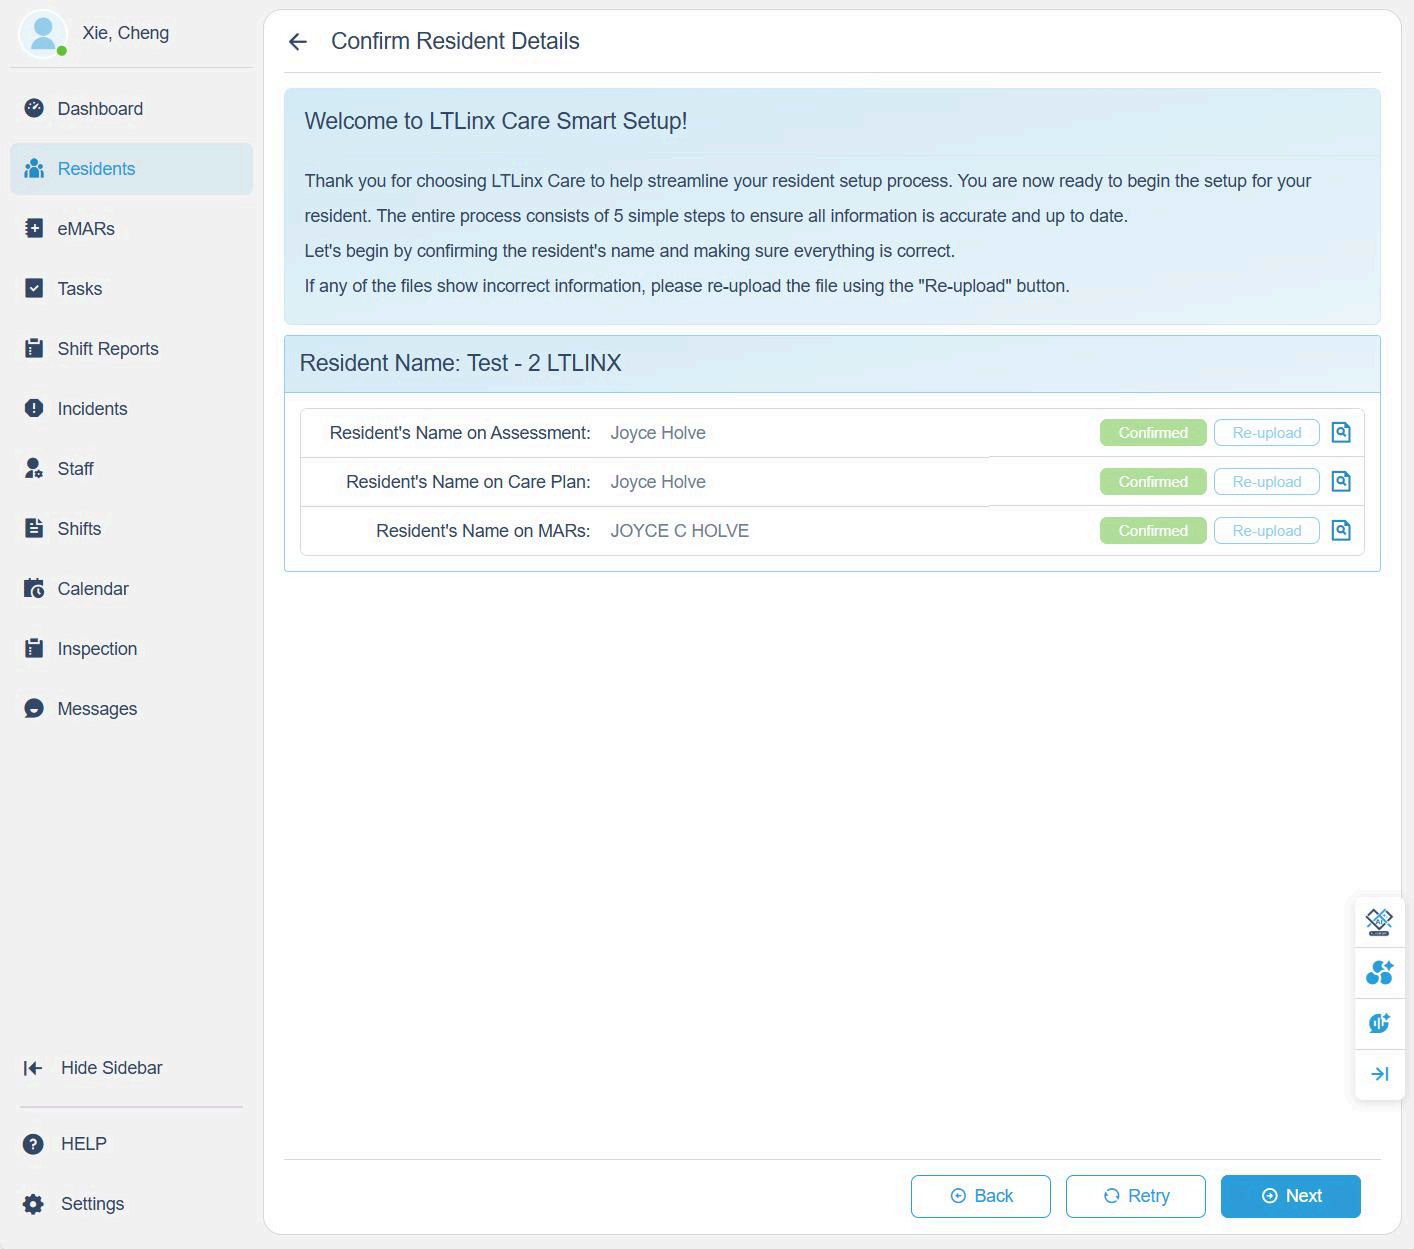
5. Confirm Resident Details
On the confirmation page, review the resident's name and details extracted from the uploaded files.
- Ensure you uploaded the correct documents.
- If any information is incorrect, click Re-upload to replace the file.
Confirm changes when prompted.
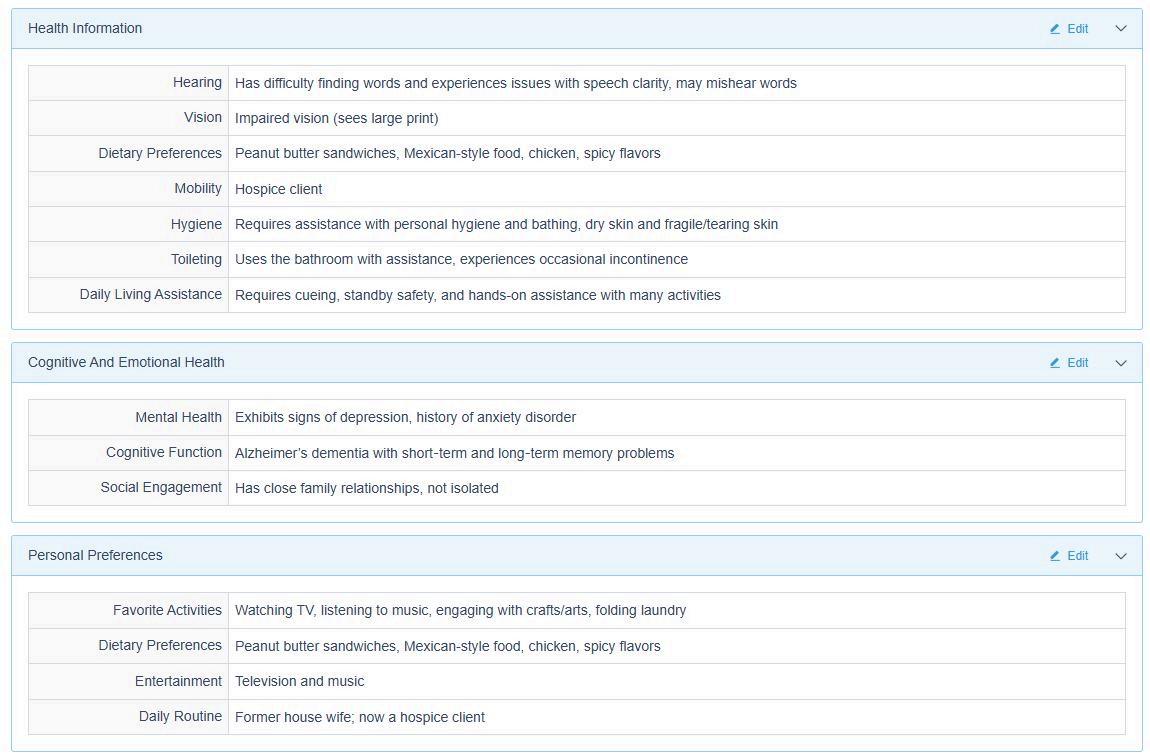
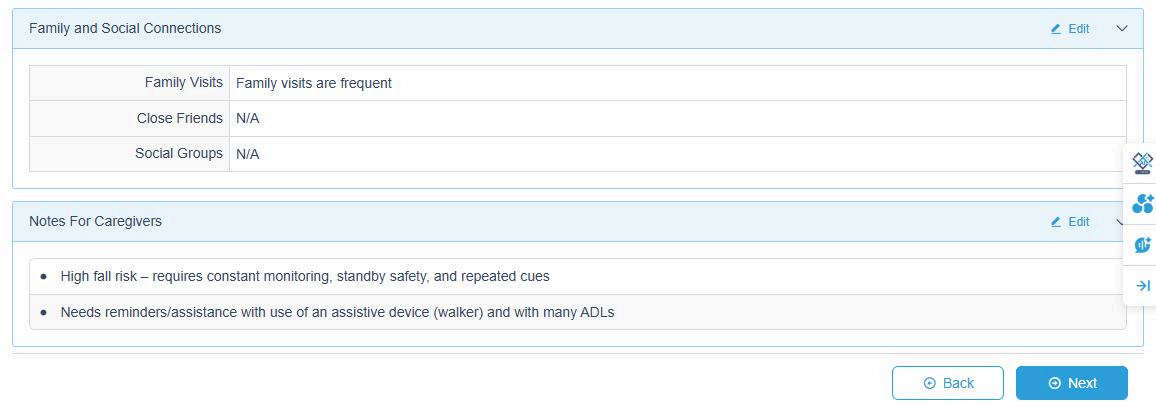
6. Review Resident Assessment
All displayed information comes from the uploaded Assessment file.
Carefully review each section — for example:
- Personal information
- Physical condition
- Cognitive status
- Behavioral notes
- Nutrition and care needs
Click Edit (top-right of each section) to make corrections. You can also upload a resident's profile picture here.


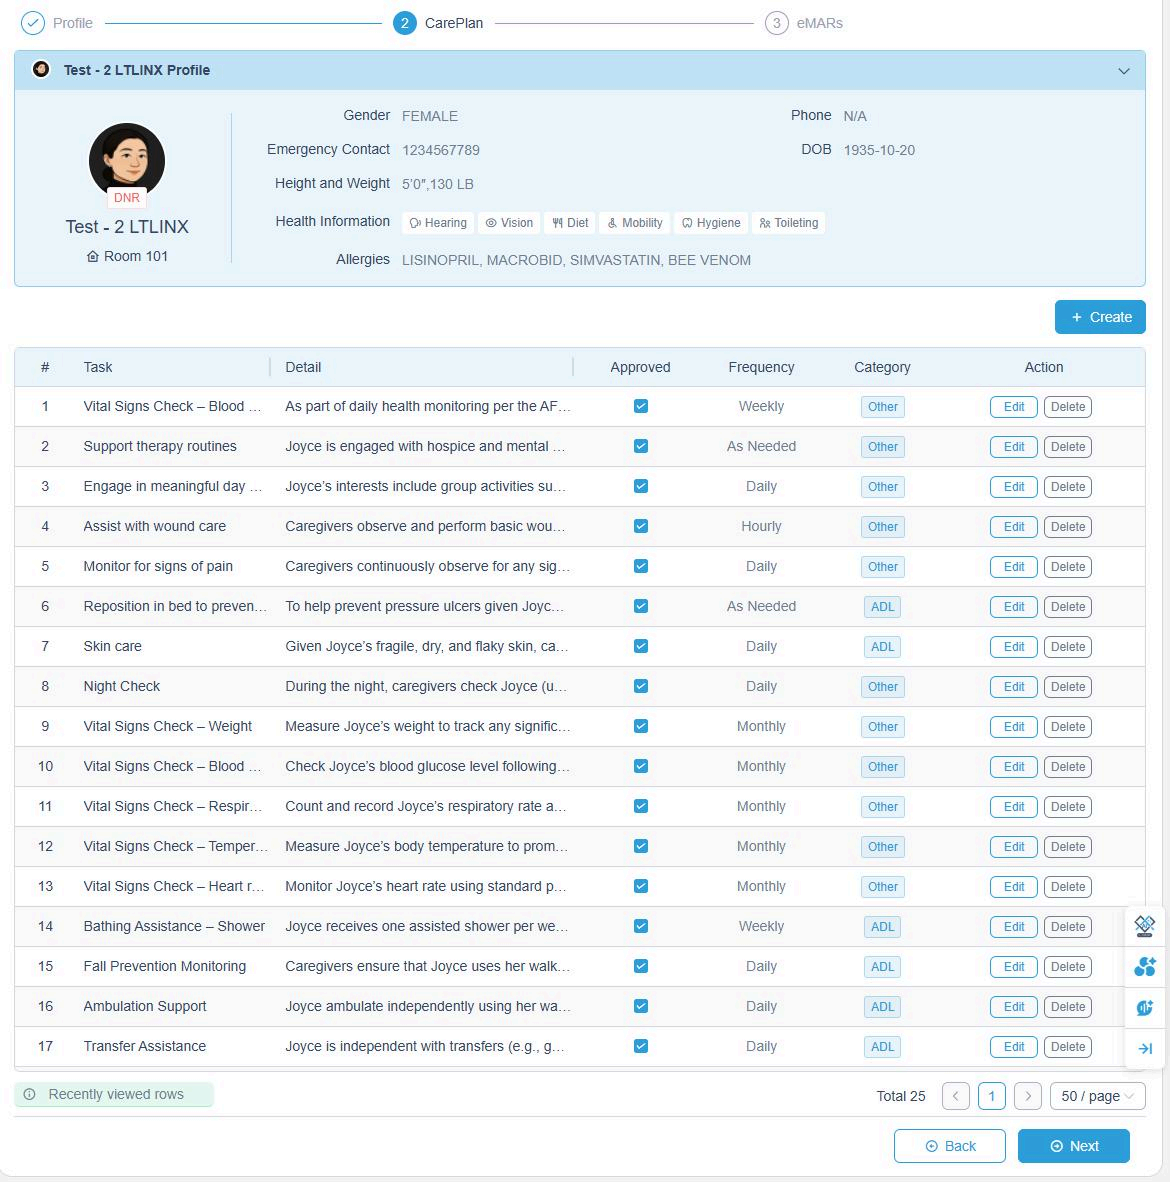
7. Review Care Plan
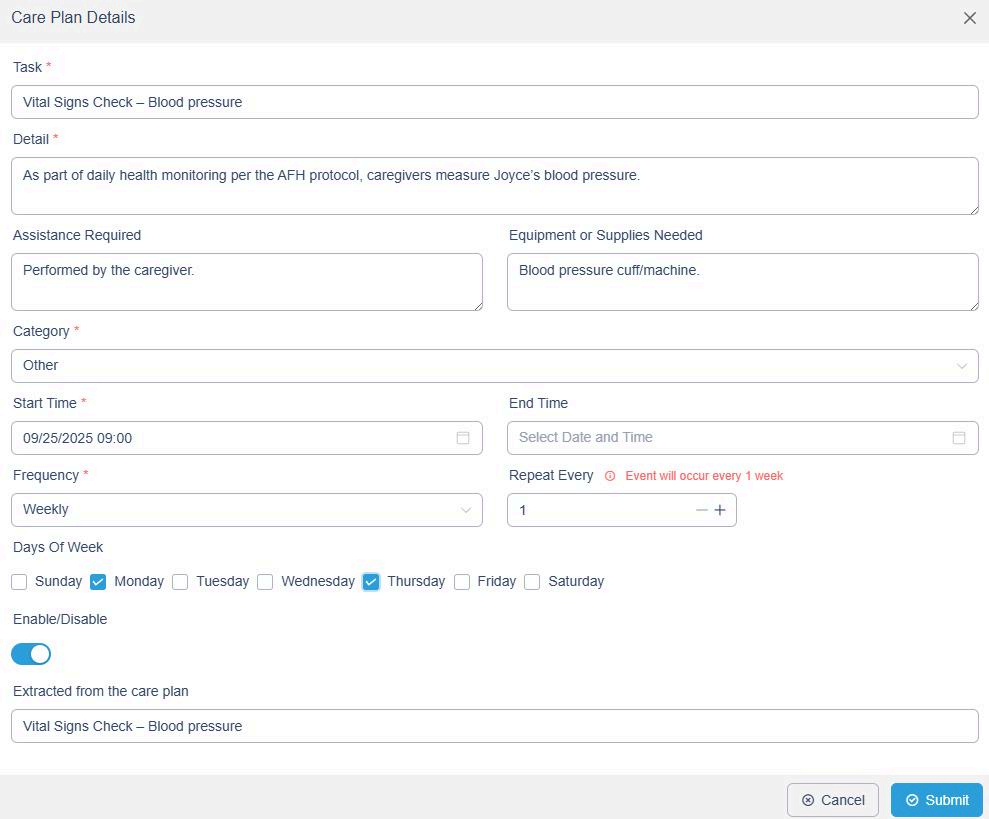
All care tasks are AI-translated from your uploaded Care Plan. Please carefully review each task, click Edit.
If you need to manually add tasks, click + Create and fill in task details (category, frequency, equipment, etc.).
Please ensure:
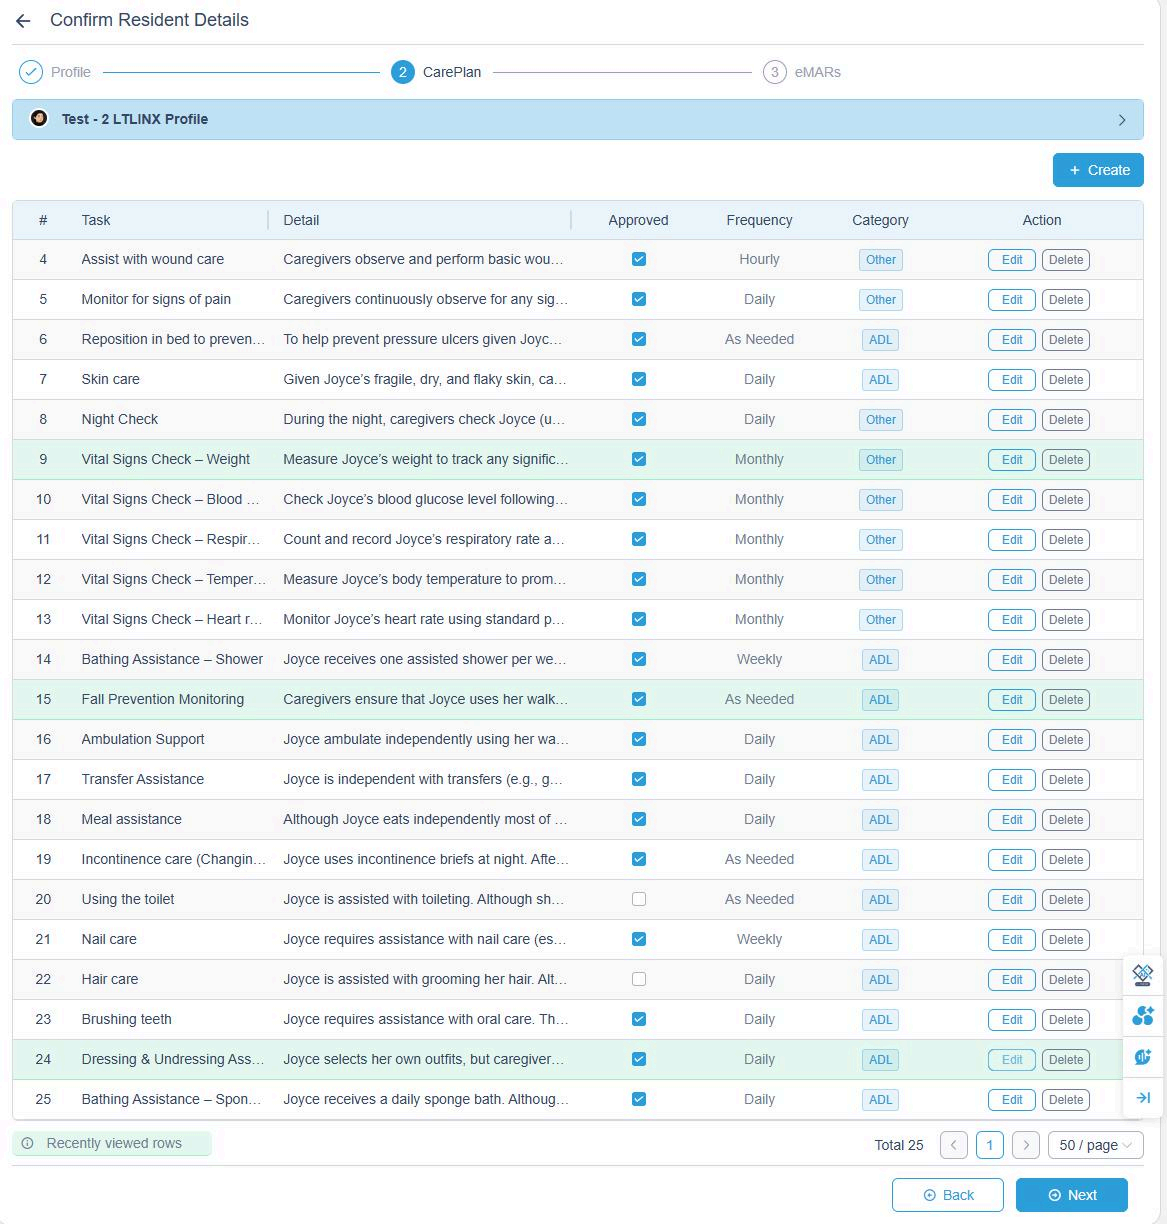
- Review all tasks — the total number of extracted tasks will be displayed at the bottom of the list.
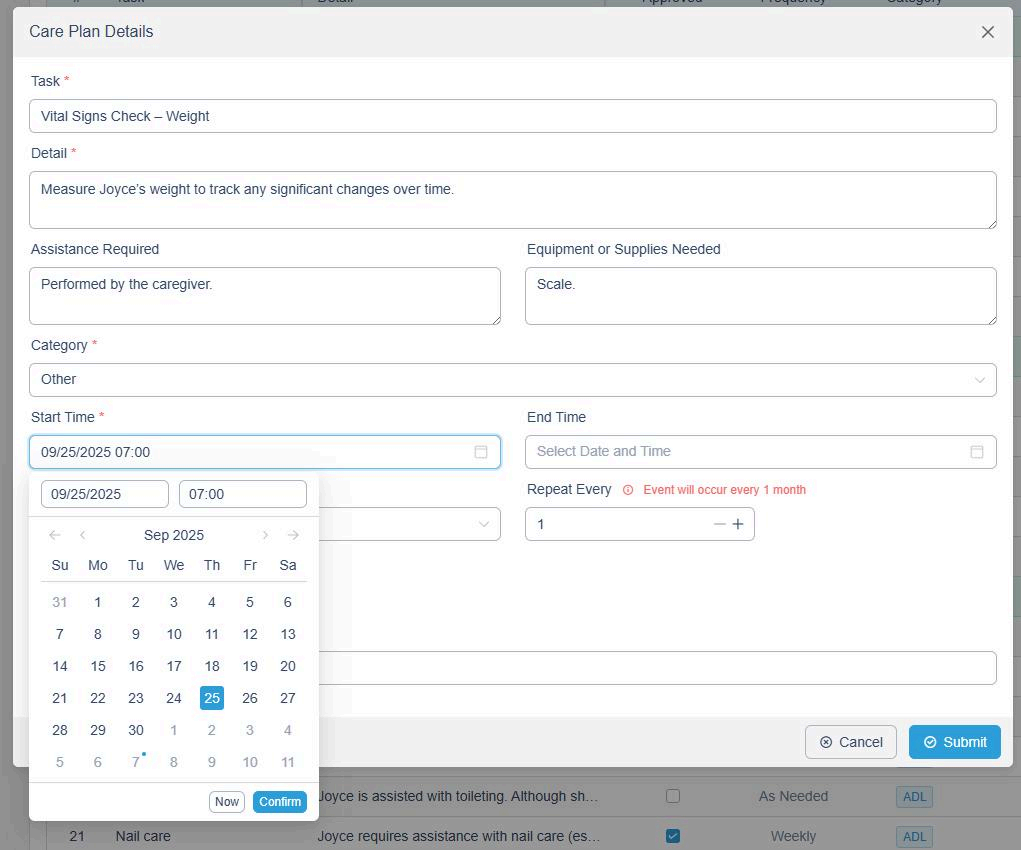
- Set Start Time and Frequency for each task.
- Uncheck any tasks you do not want visible to caregivers (e.g., "Use toilet").
When all tasks are correct, click Submit to confirm. Approved tasks will turn green and appear on the Tasks page to guide caregivers' daily activities.
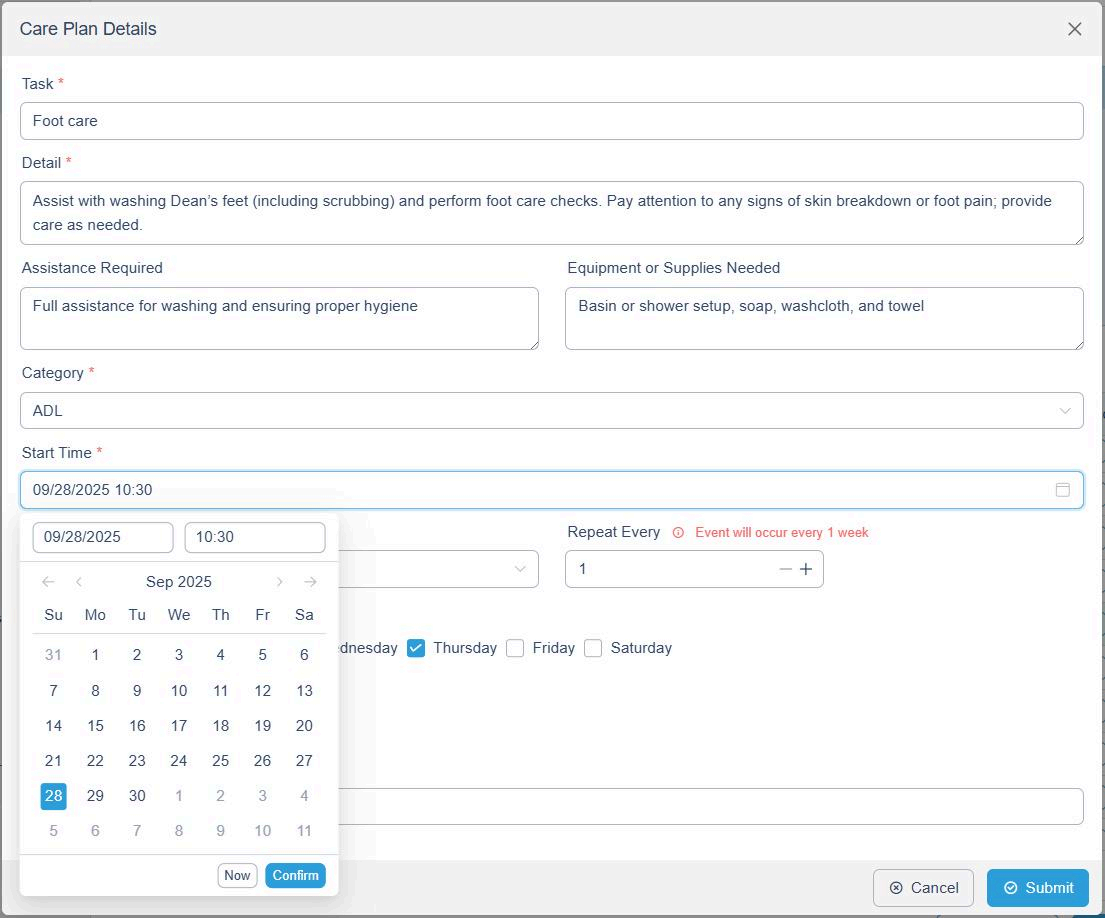
Frequency Setup Details
- Here are examples of how to set custom schedules:
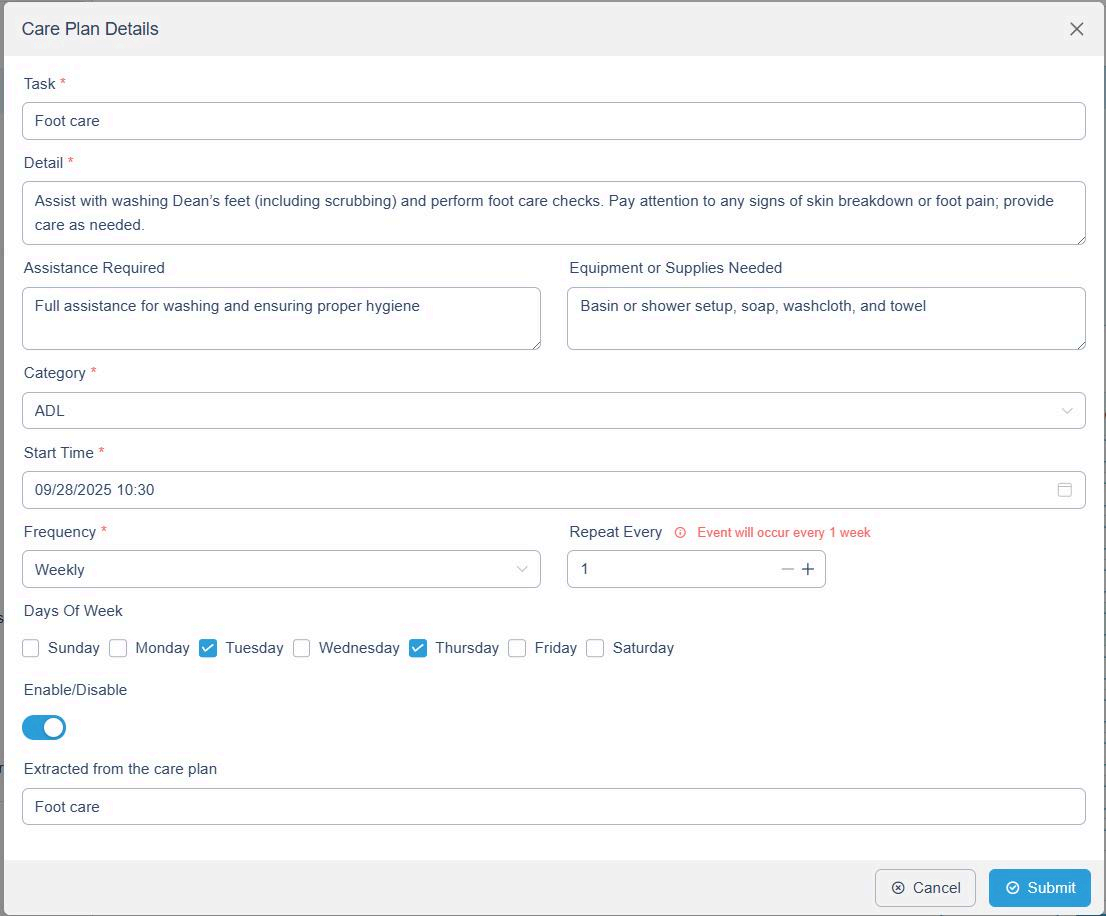
Example 1: Foot care on every Tuesday & Thursday at 10:30 AM
- Choose Weekly under Frequency.
- Select Tuesday and Thursday.
- Set Start Time to 10:30.
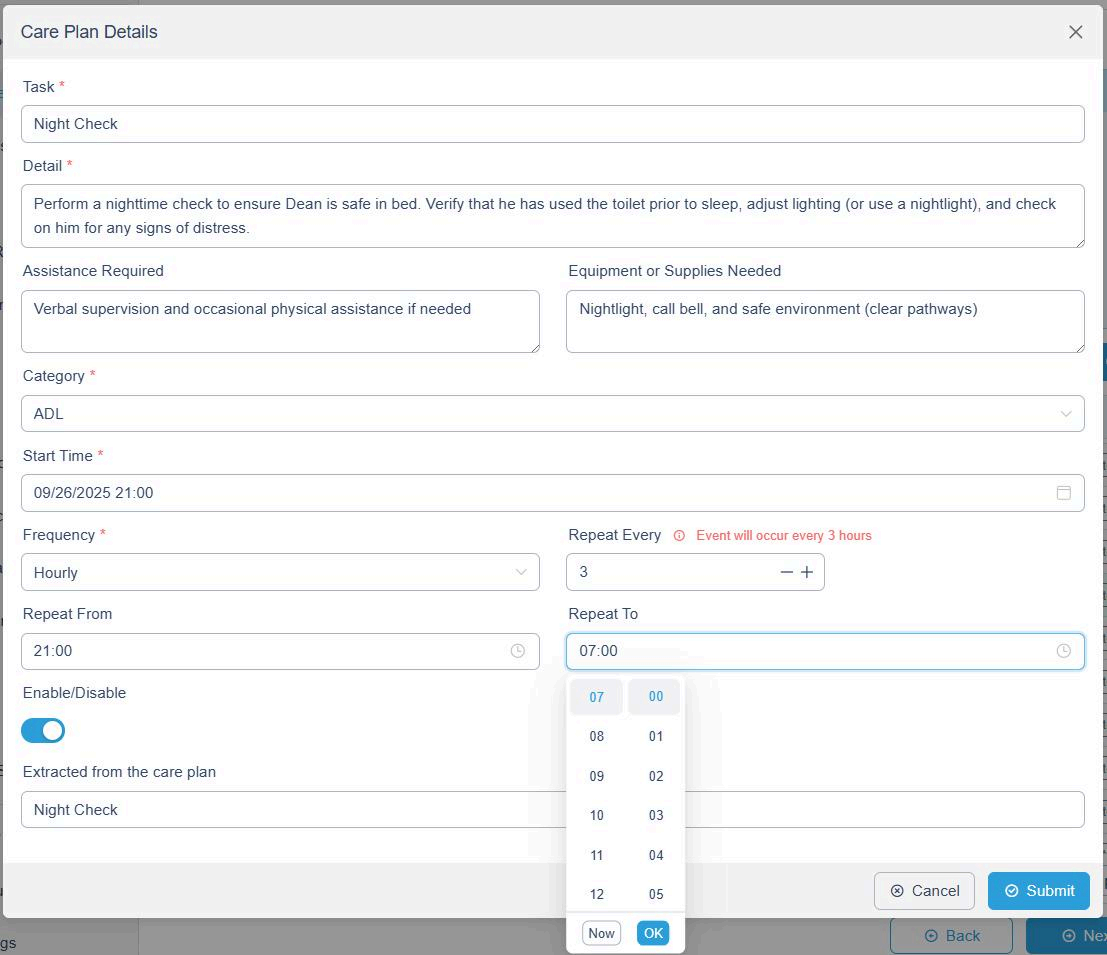
Example 2: Night checks every 3 hours between 9 PM and 7 AM
- Choose Hourly.
- Set Repeat From: 21:00
- Set Repeat To: 07:00
- Set Repeat Every: 3
- Adjust any other time settings as needed.
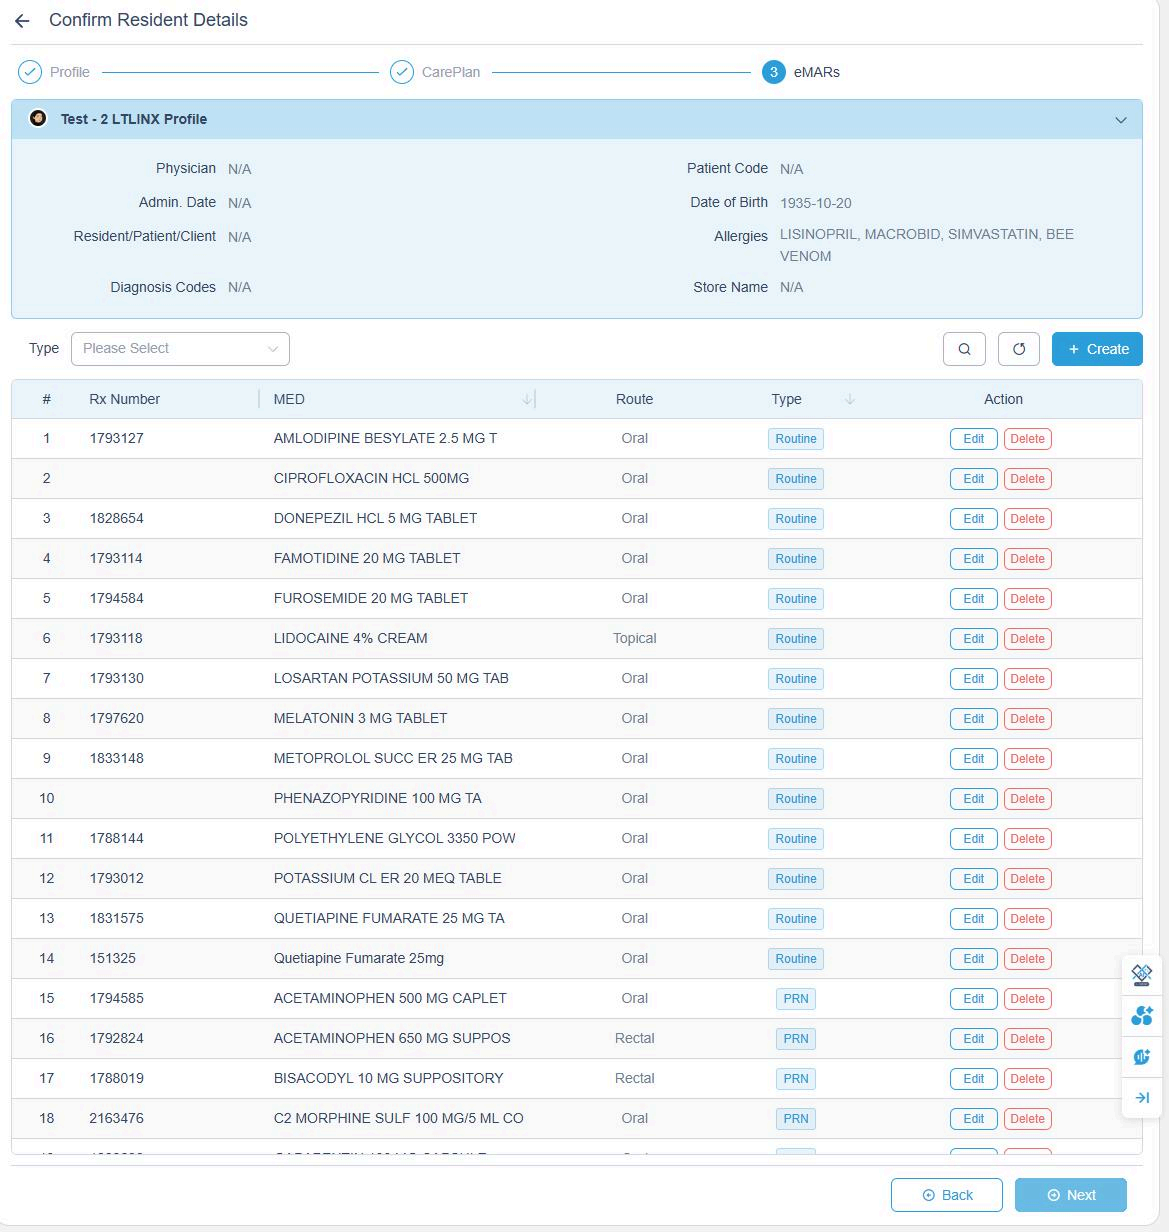
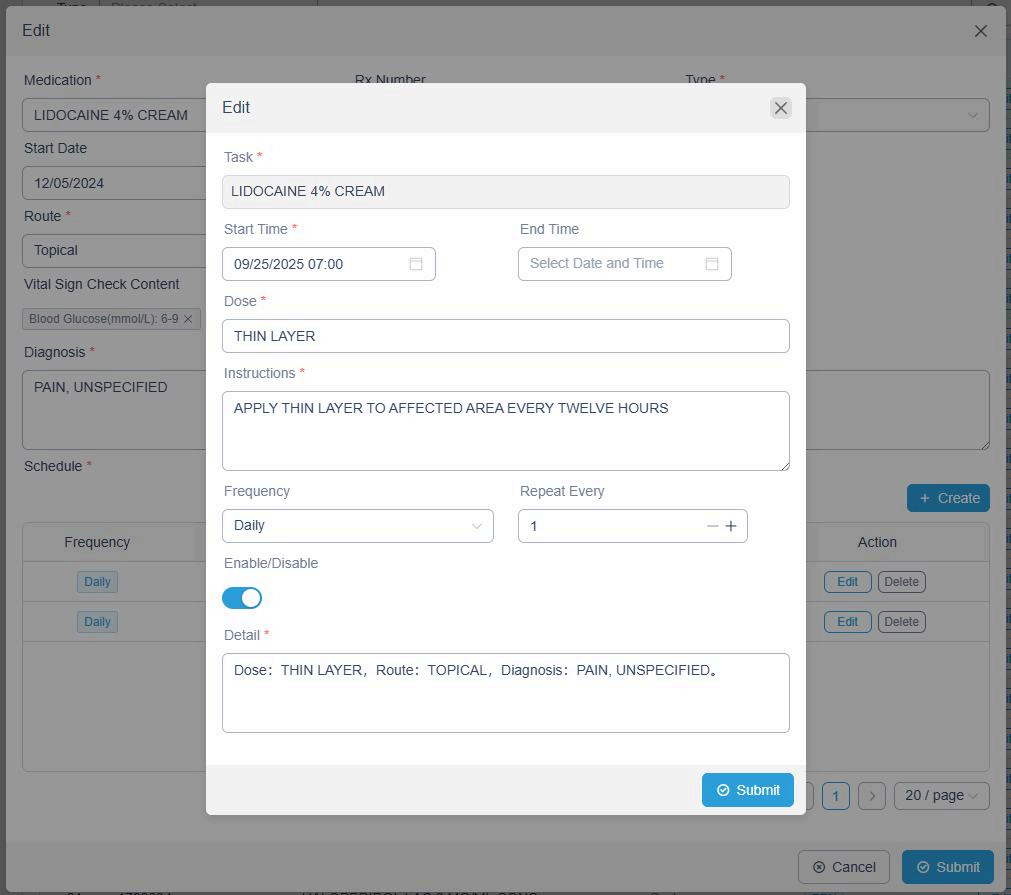
8. Review Medications
The Medication List is automatically generated from the uploaded MAR file.
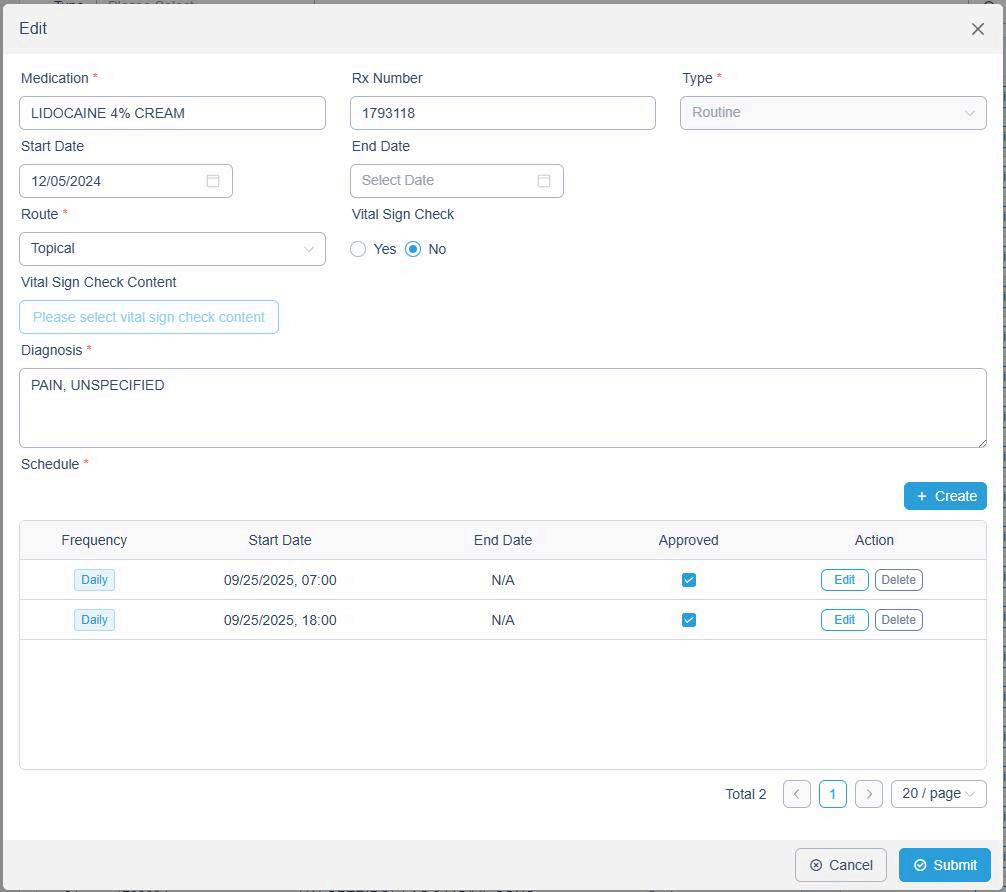
- Review each medication carefully by clicking Edit.
- If a medication is administered multiple times a day, detailed instructions will appear beneath it — verify each for accuracy.
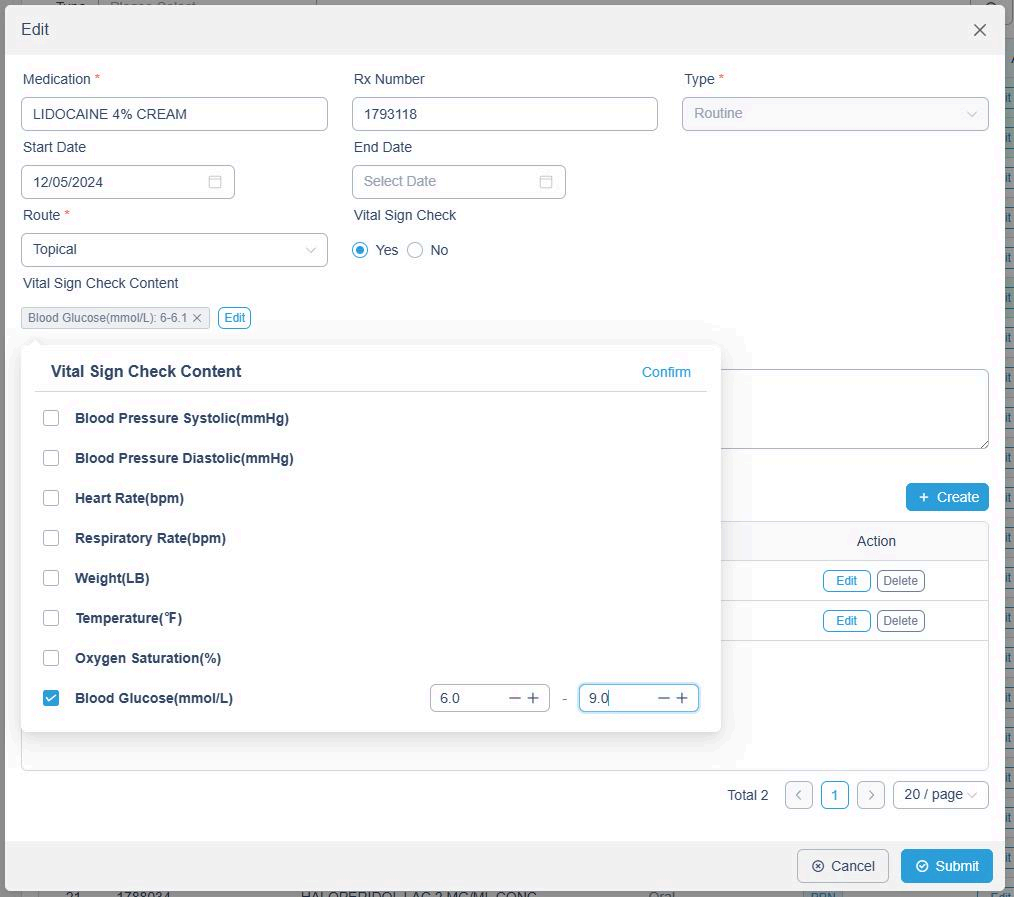
- For medications requiring vital sign checks (e.g., blood pressure, oxygen saturation), enable the option and set the safe range. These parameters will appear in the eMAR.
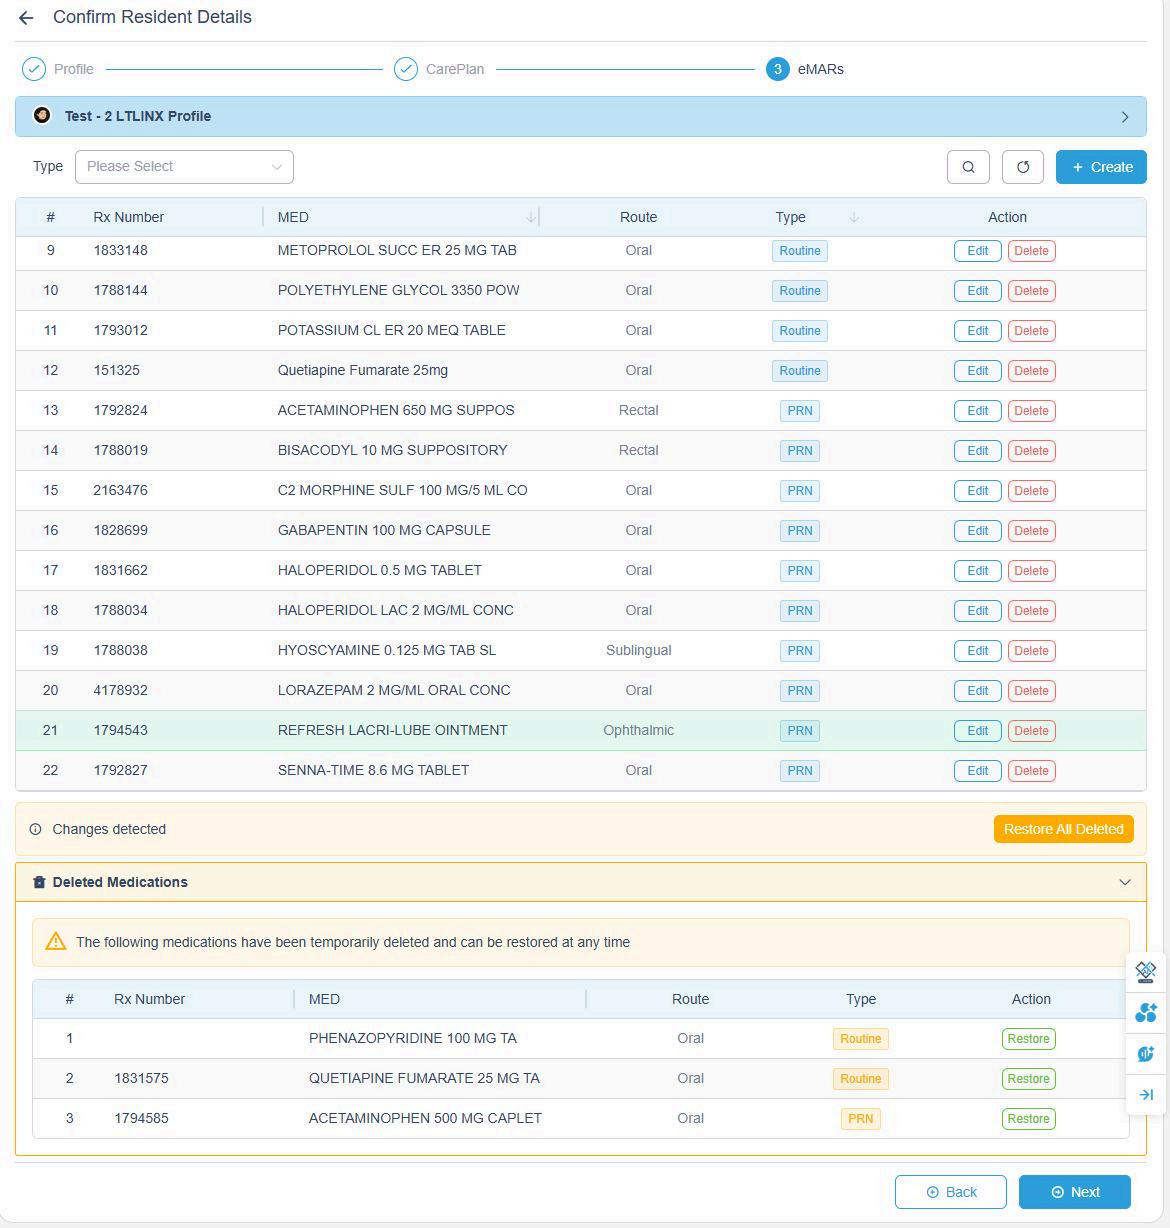
If a medication is no longer required:
- Click Delete next to it.
- It won't be permanently removed — it moves to the "Deleted Medications" section and can be restored anytime.
Confirm changes when prompted.
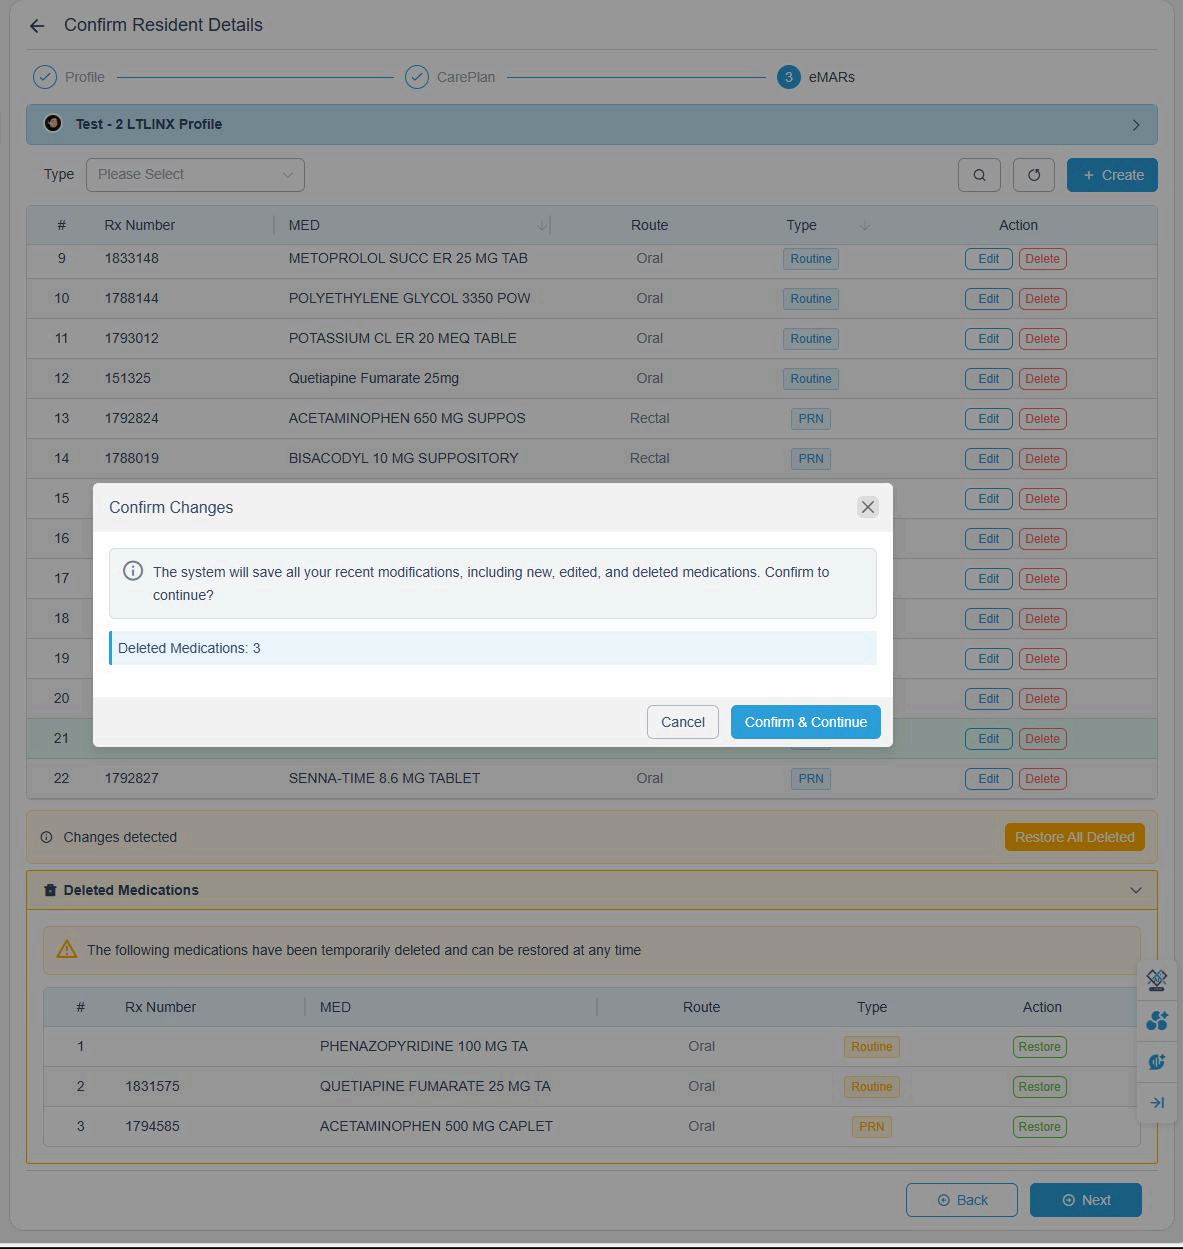
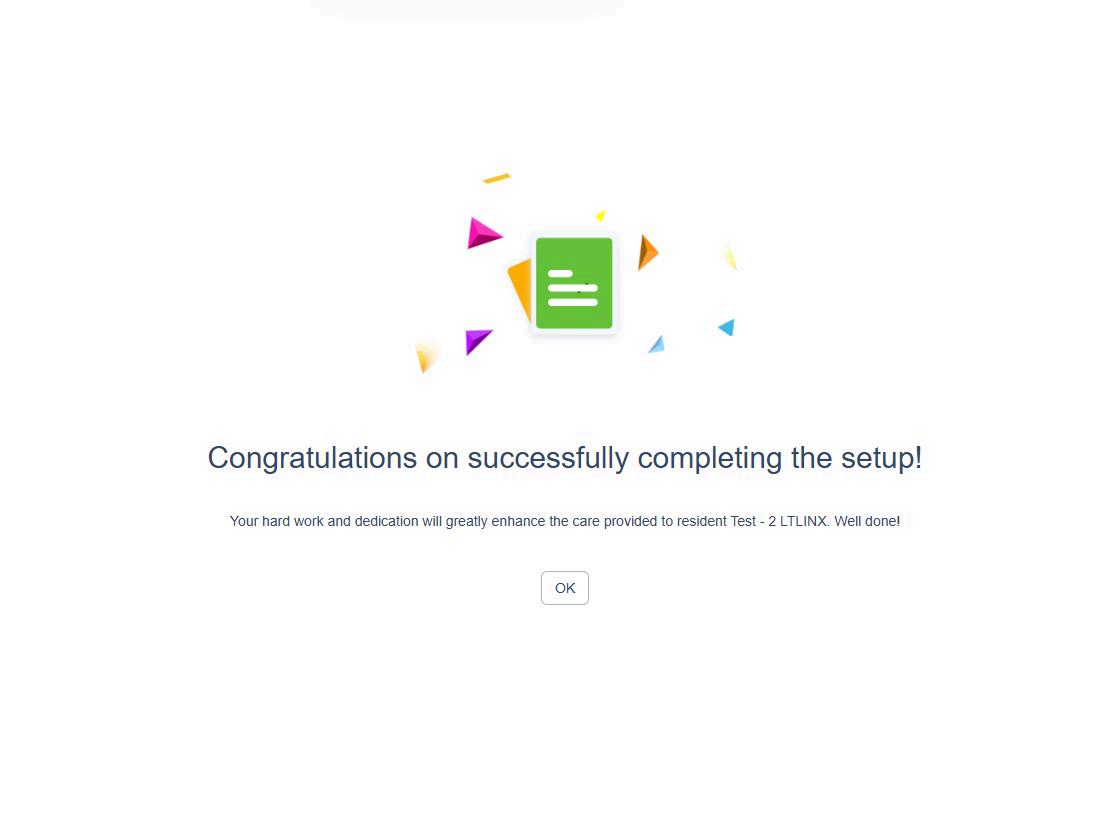
9. Complete Setup
After all medications are reviewed and approved, setup for this resident is complete.
A confirmation message will appear: ✅ "Setup Completed Successfully!"