Setup Guide
Resident Page User Guide
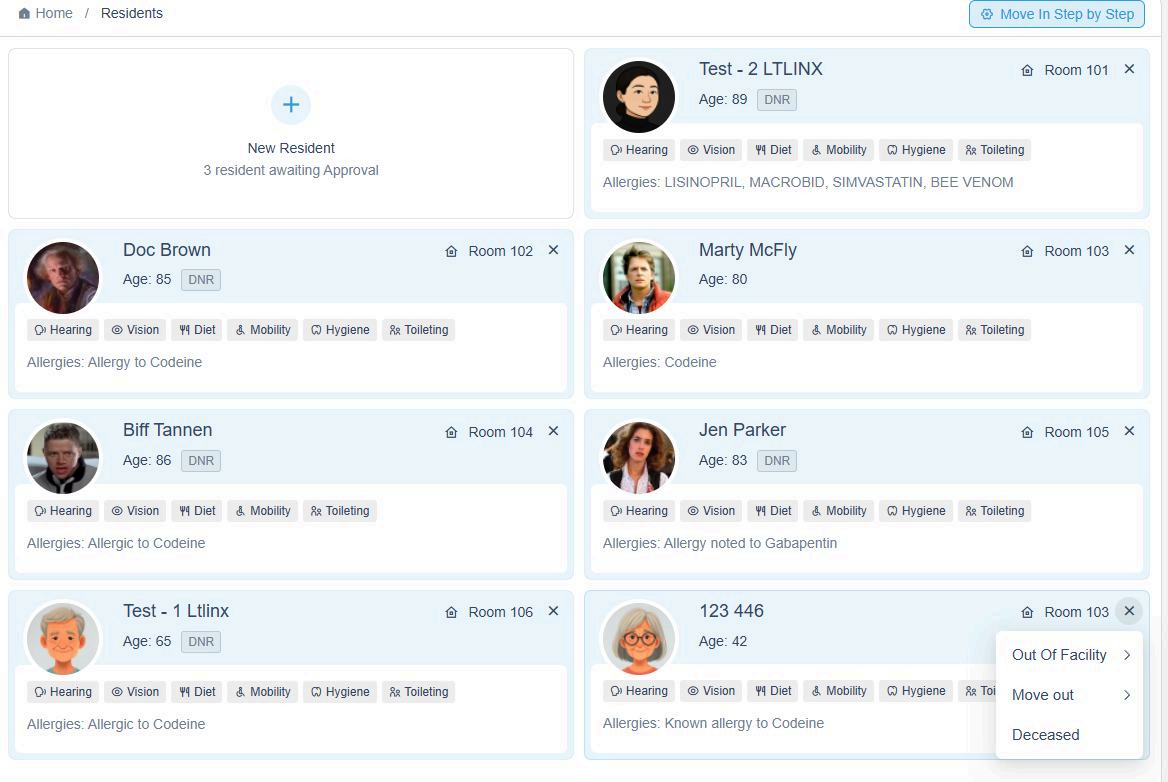
1. Managing Moved-Out or Deceased Residents
- If a resident has moved out of your facility, click the "X" icon in the top-right corner of their resident card.
- All data for this resident will be securely stored in our system for five years.
- If you would like to retain the data beyond that period, please contact our support team.
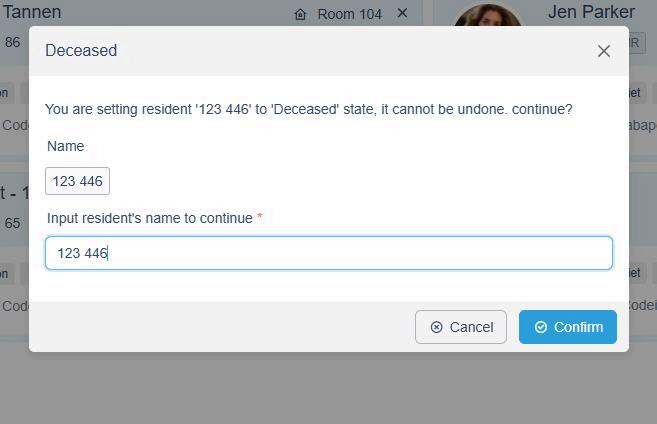
- To mark a resident as Deceased, select the "Deceased" option and confirm by typing the resident's name.
- ⚠️ Once confirmed, this action cannot be undone.
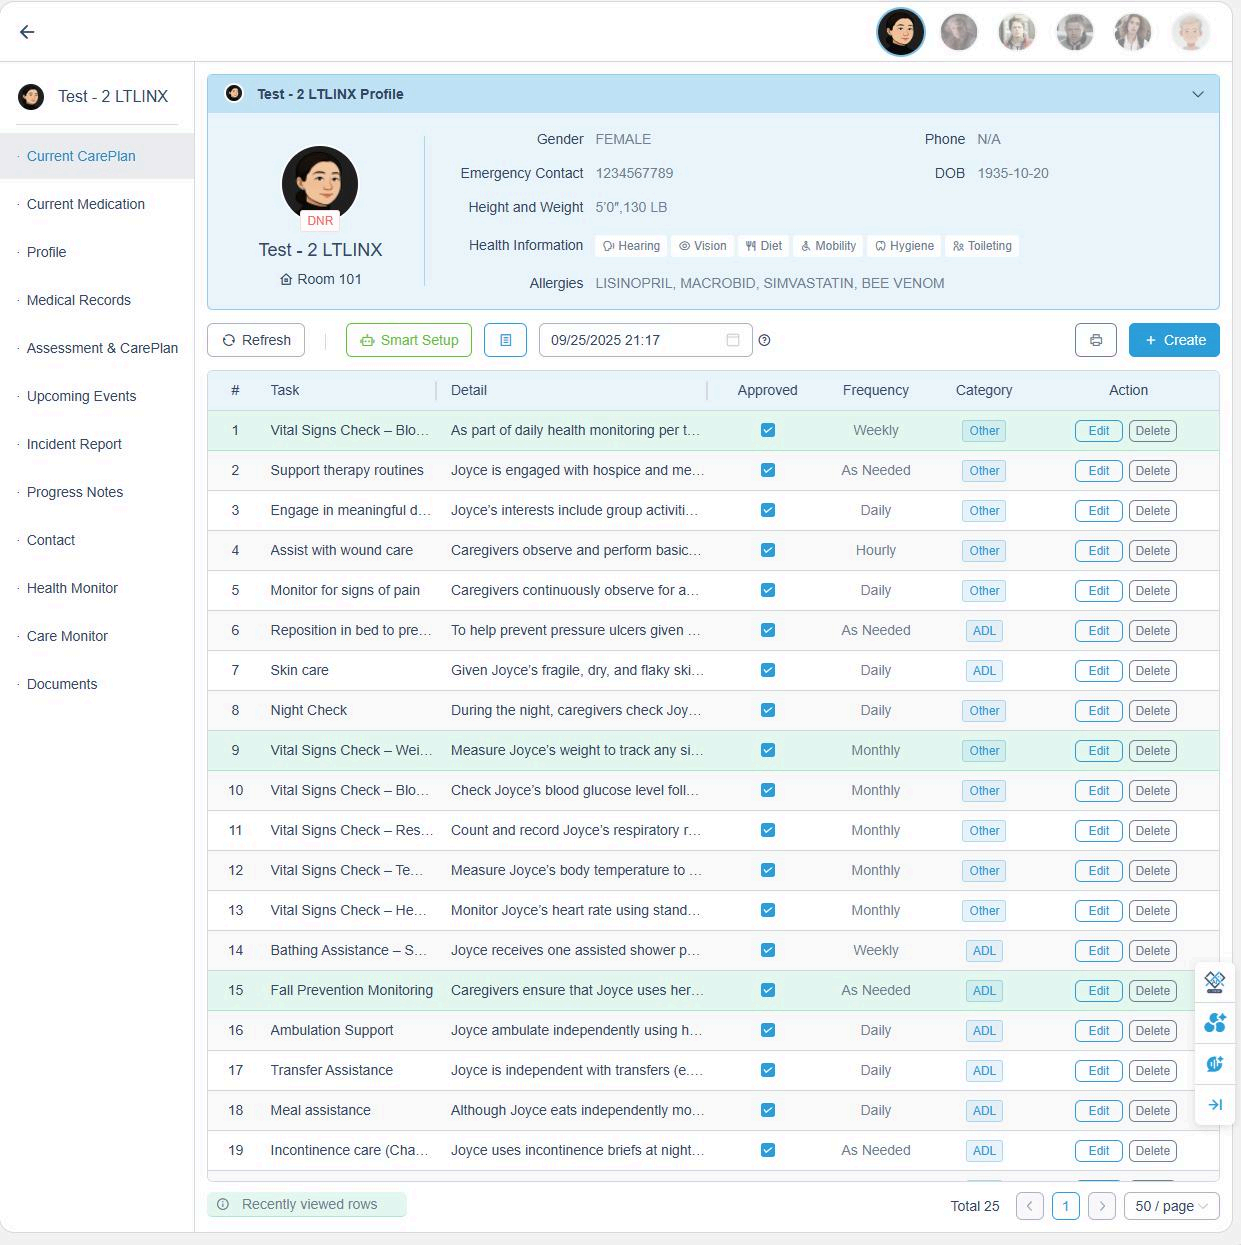
2. Updating or Editing a Care Plan
- Go to the Current Care Plan page under the specific resident.
- Click Edit next to the task you want to update.
- Alternatively, click the Smart Setup button to reprocess the Care Plan using AI for updates.
- This allows you to easily refresh task lists whenever new Care Plan information becomes available.
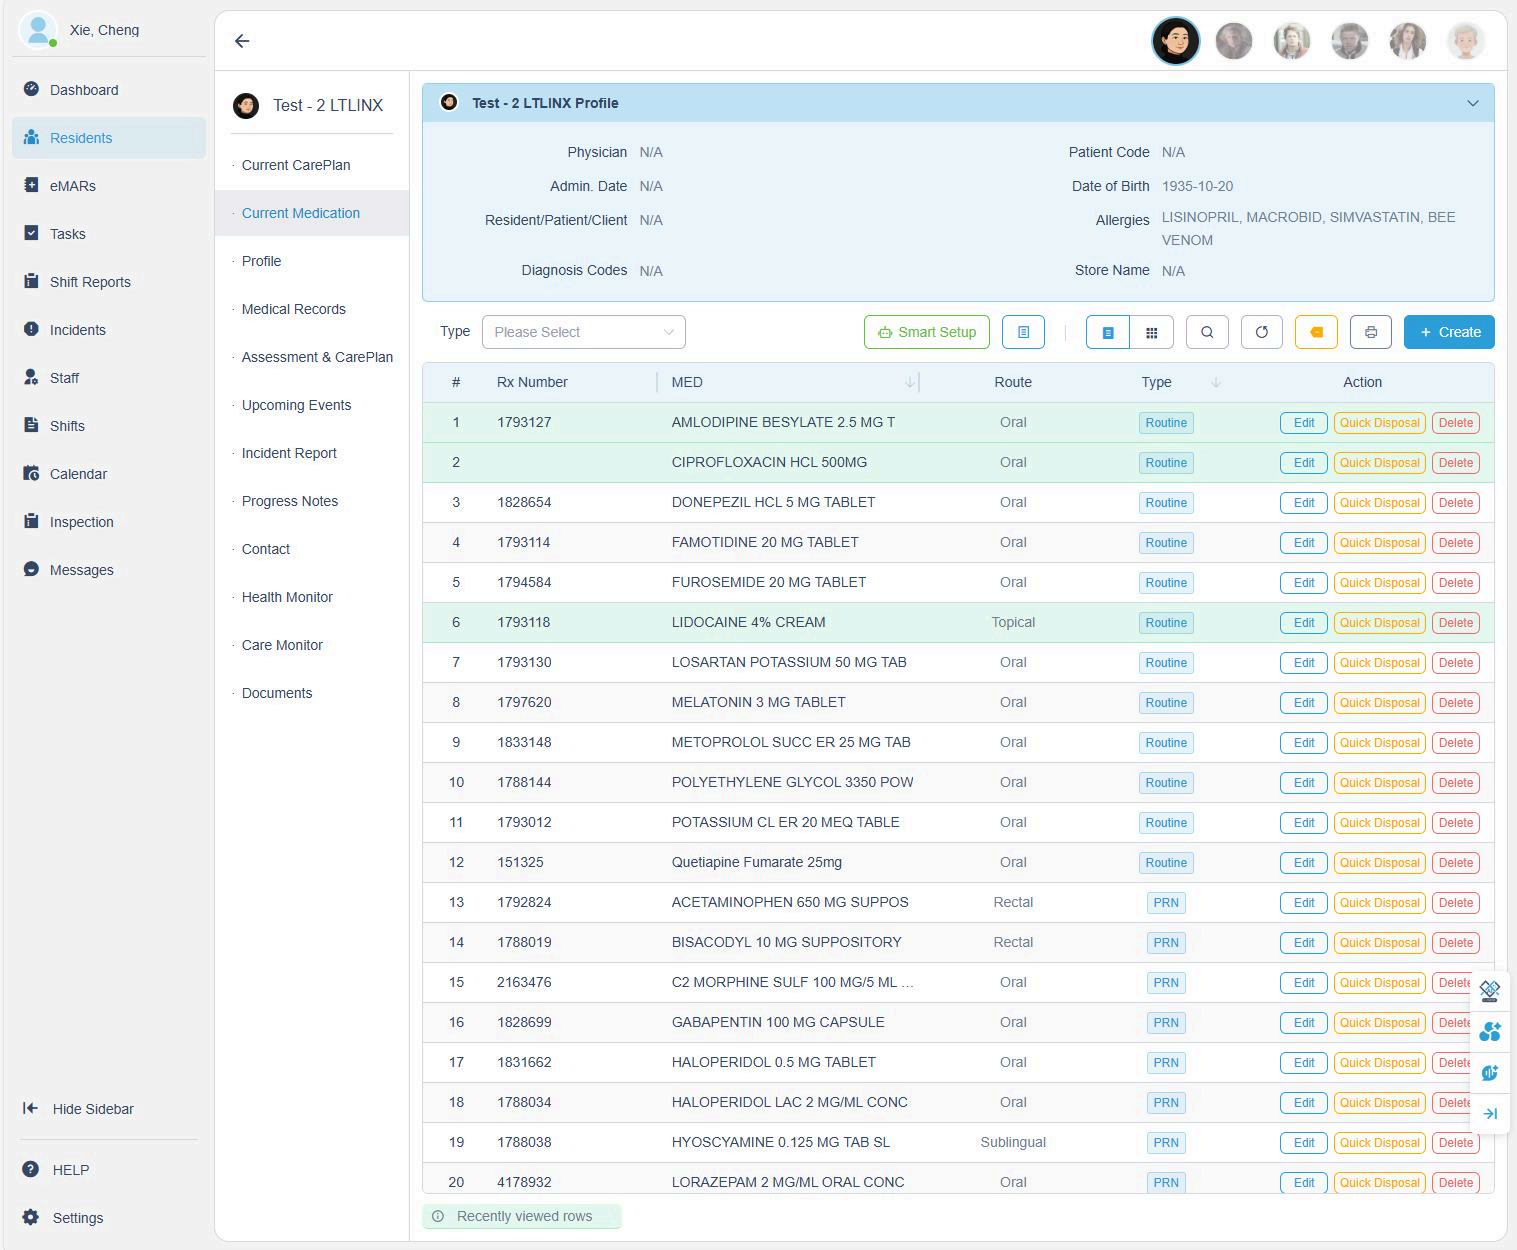
3. Managing Medications
- If you receive a new physician order, click the Smart Setup button and upload the new order.
- The AI system will automatically extract and add new medications.
- Please review all added medications carefully to ensure accuracy.
- You can also:
- Edit medication details
- Delete discontinued medications, or
- Print the full medication list
- These actions are available from the Current Medication page.
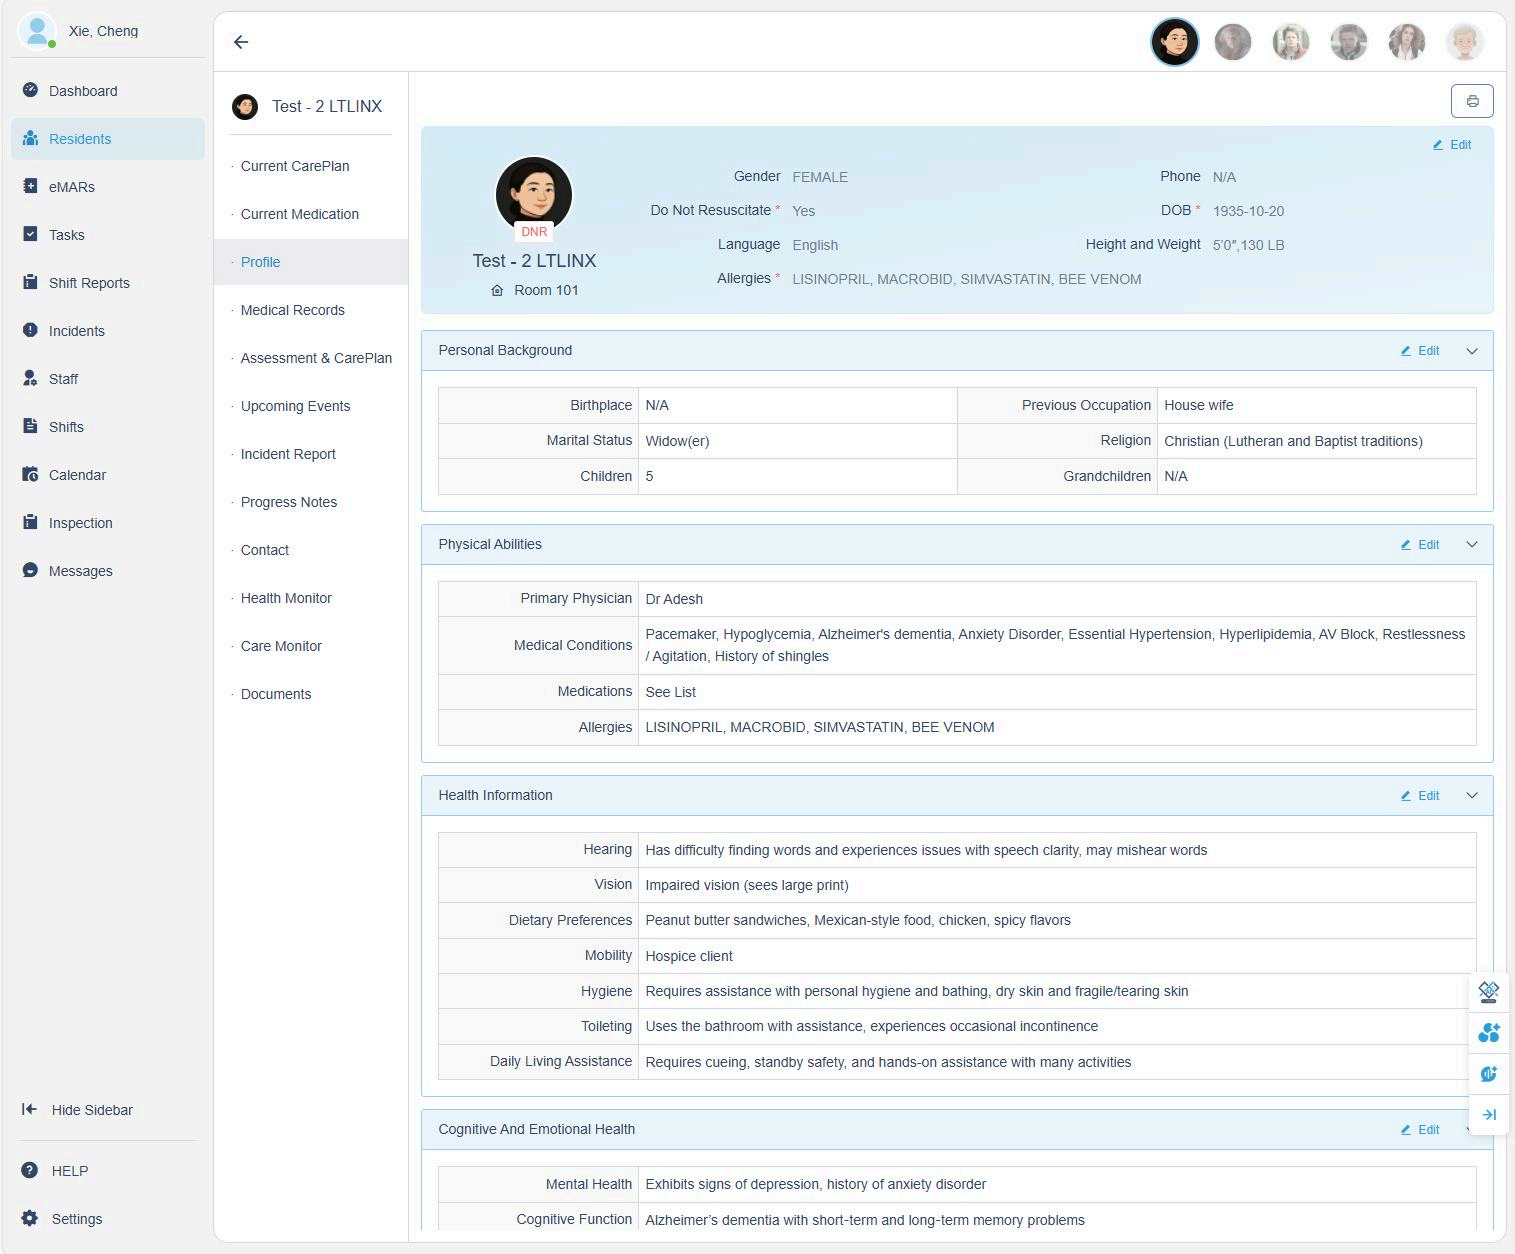
4. Viewing Resident Profile
The Profile page contains comprehensive resident information, including:
- Personal background (e.g., marital status, children, religion)
- Physical abilities and medical conditions
- Health information (hearing, vision, dietary preferences, hygiene, toileting, mobility)
- Cognitive and emotional health
To update any section, click Edit in the upper-right corner of the section.
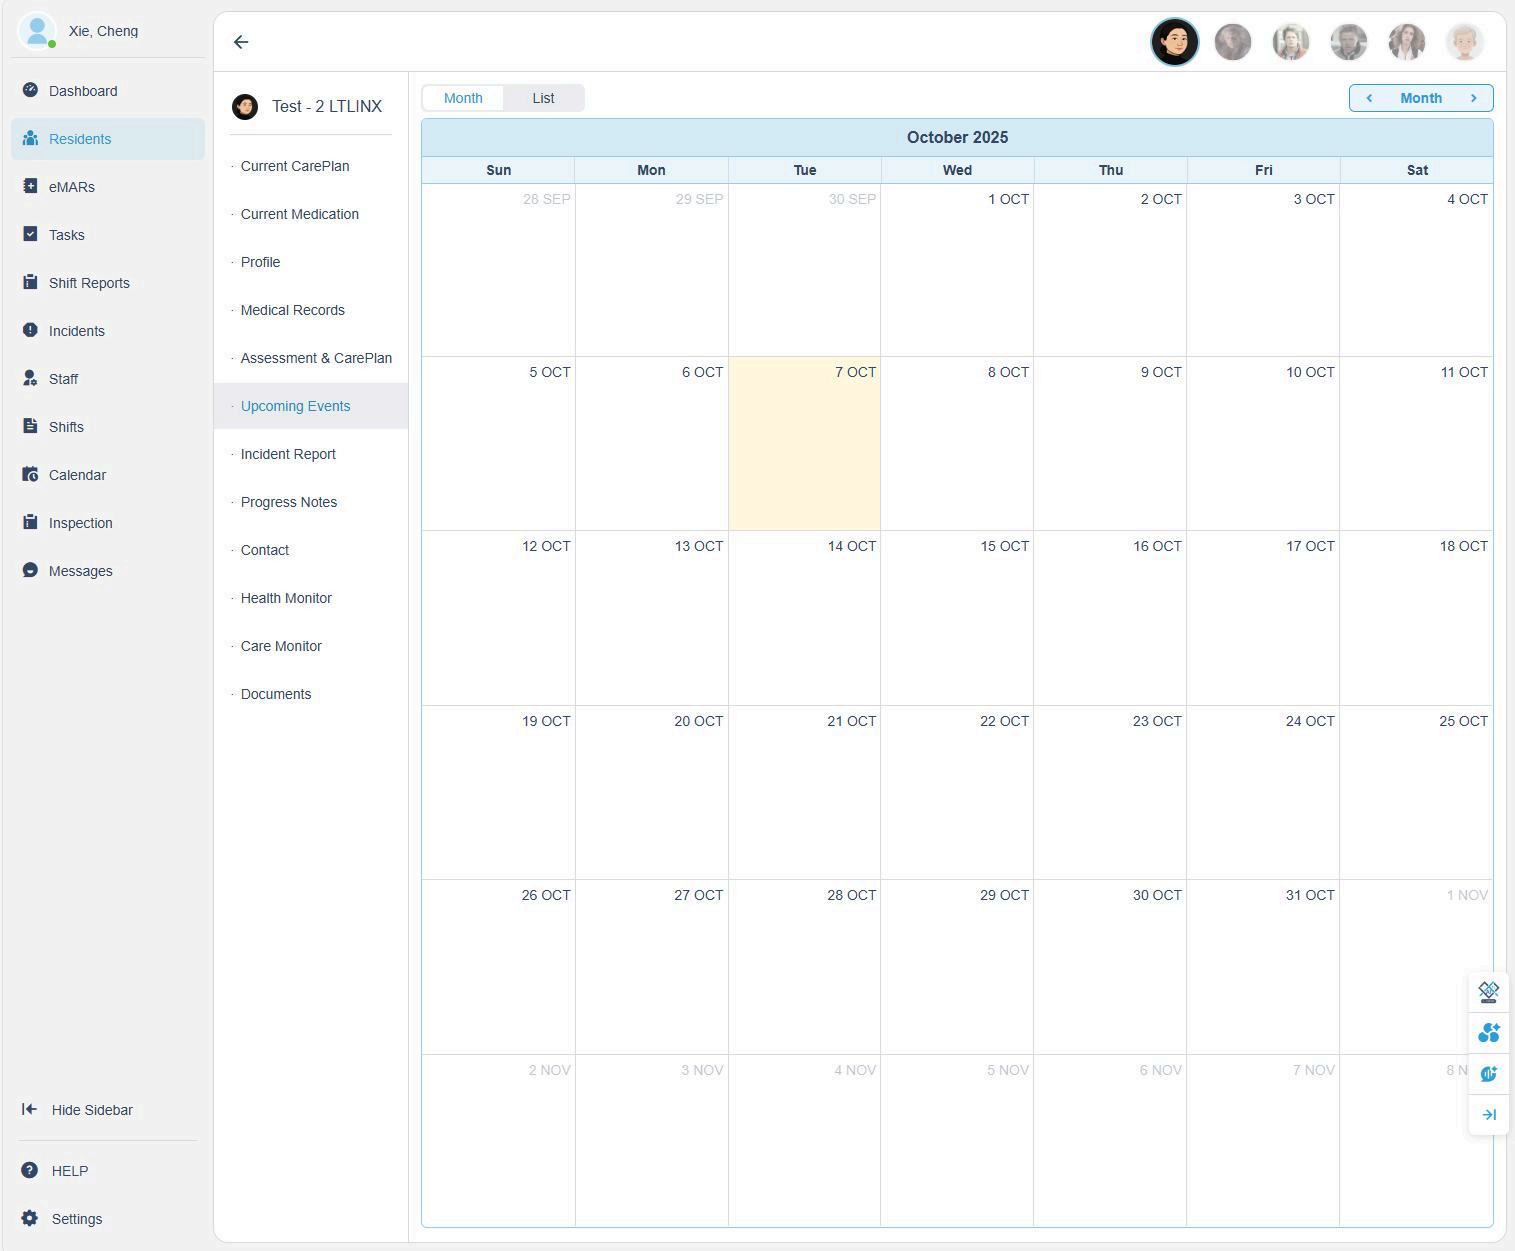
5. Managing Appointments & Calendar
- You can add resident appointments directly to their personal calendar.
- These appointments automatically sync to:
- The Tasks page, and
- The Admin's calendar
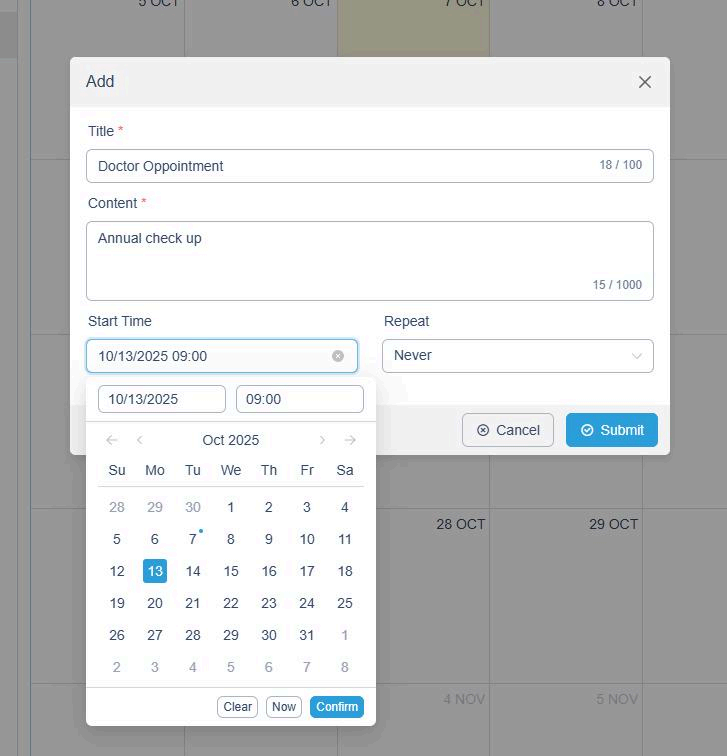
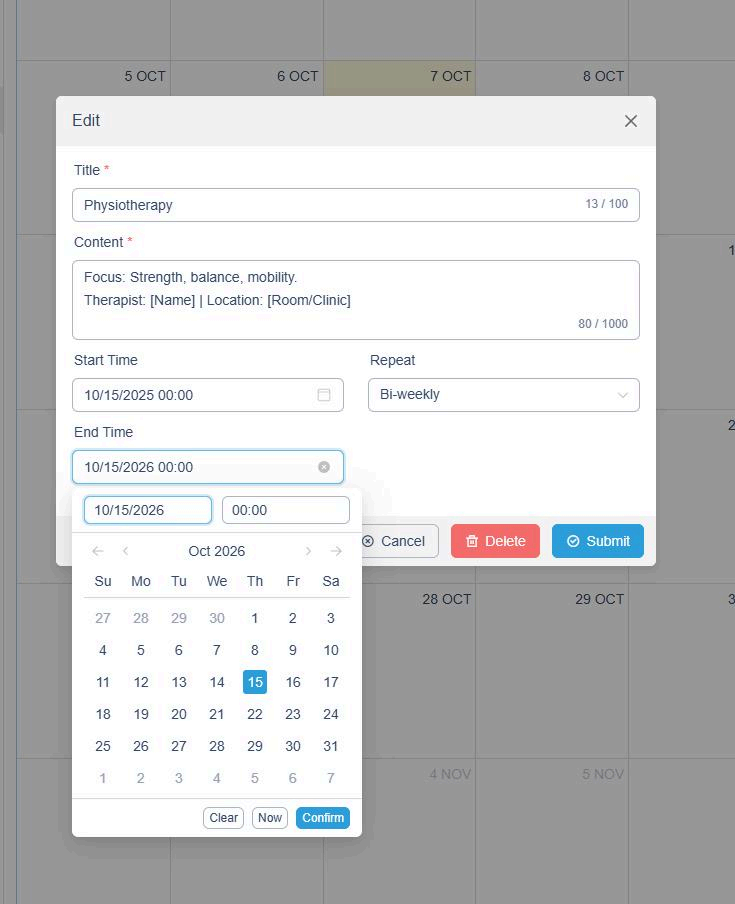
To add or edit an appointment:
- Click a date on the calendar.
- Enter the title, details, and time.
- Choose whether it repeats (e.g., daily, weekly, bi-weekly).
- Click Submit to save.
Example:
- Title: Doctor Appointment
- Content: Annual check-up
- Start Time: 10/13/2025, 9:00 AM
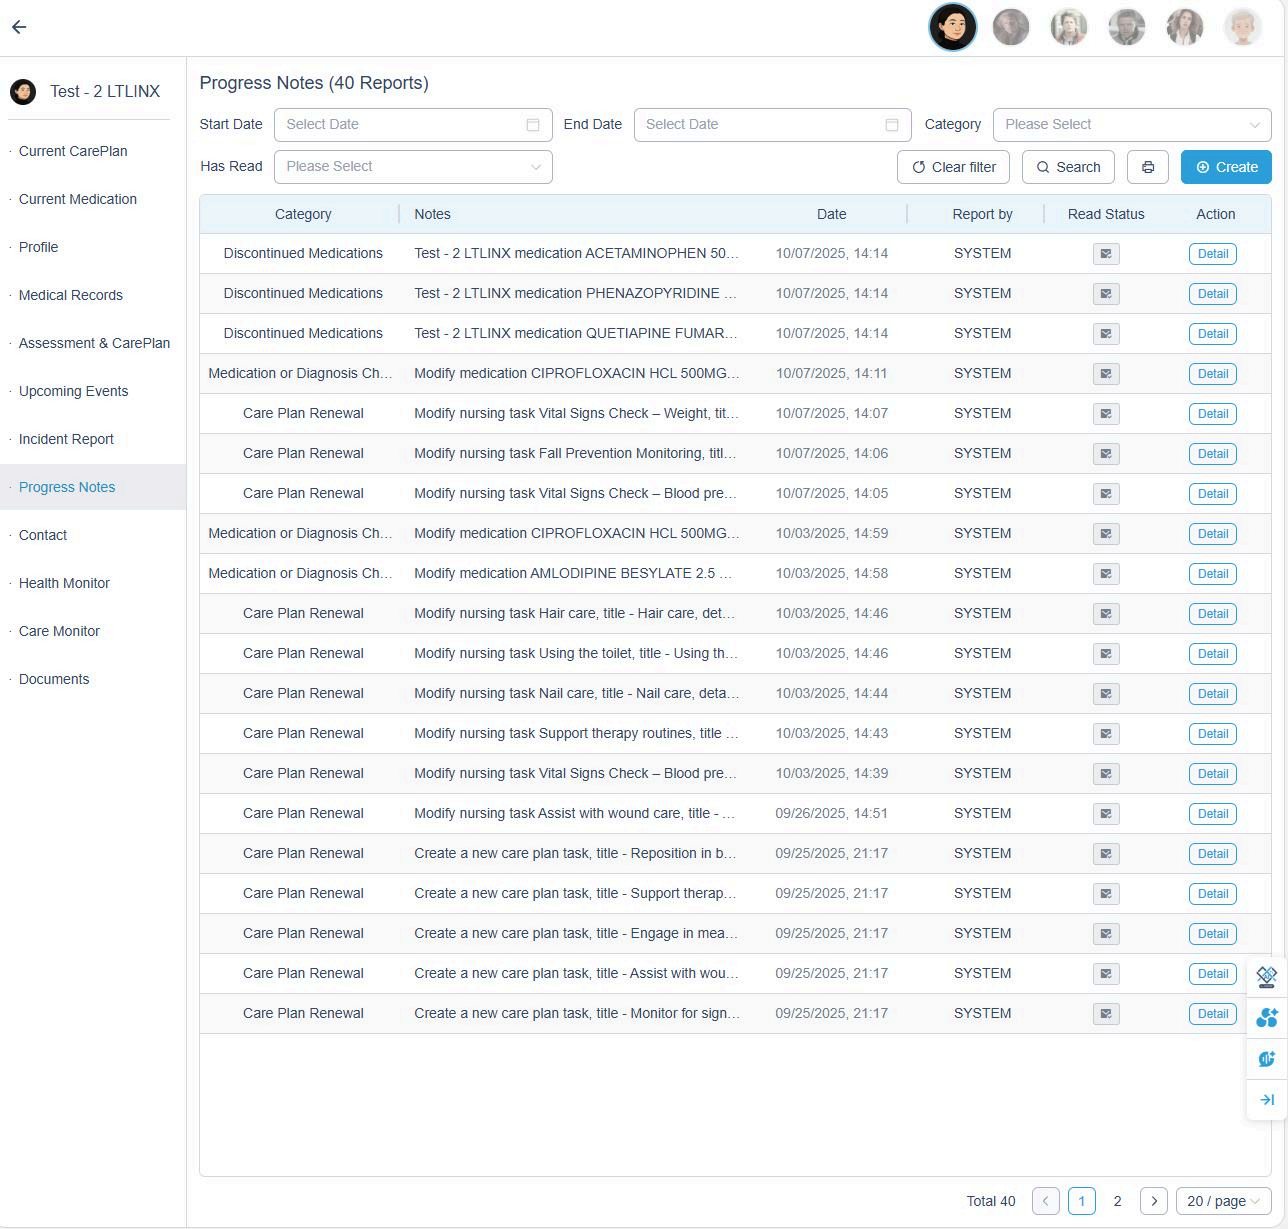
6. Progress Notes
- Progress notes are automatically recorded by the system.
To manually add a note:
- Go to the Progress Notes page.
- Click + Create.
- Choose the resident and toggle the relevant note categories, such as:
- Behavior or Mood Changes
- Family Communication
- Healthcare Provider Updates
- Medication or Diagnosis Changes
- Mobility and Activities
- Hygiene and Personal Care
- New Symptoms or Complaints
- Sleep Patterns
- Other
- Input your note and click OK to save.
Example:
- Family Communication: Spoke with daughter about upcoming medical appointment. Family appreciative of care updates.