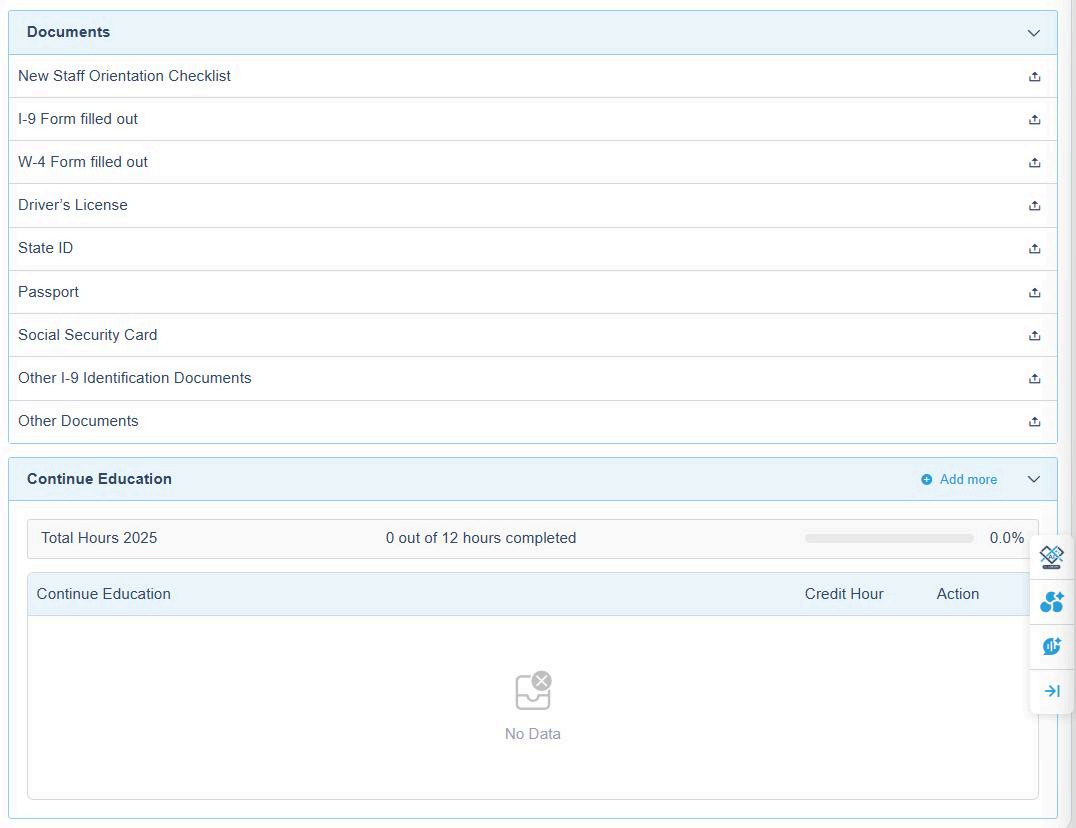
Your Status Guide
1. Accessing the Status Page
To open your Status Page:
- Click Your Status on the left sidebar.
From this page, you can:
- Manage and upload your licenses and certifications,
- Store all your important documents, and
- Track your Continuing Education (CE) credits.
2. AI Compliance Checking
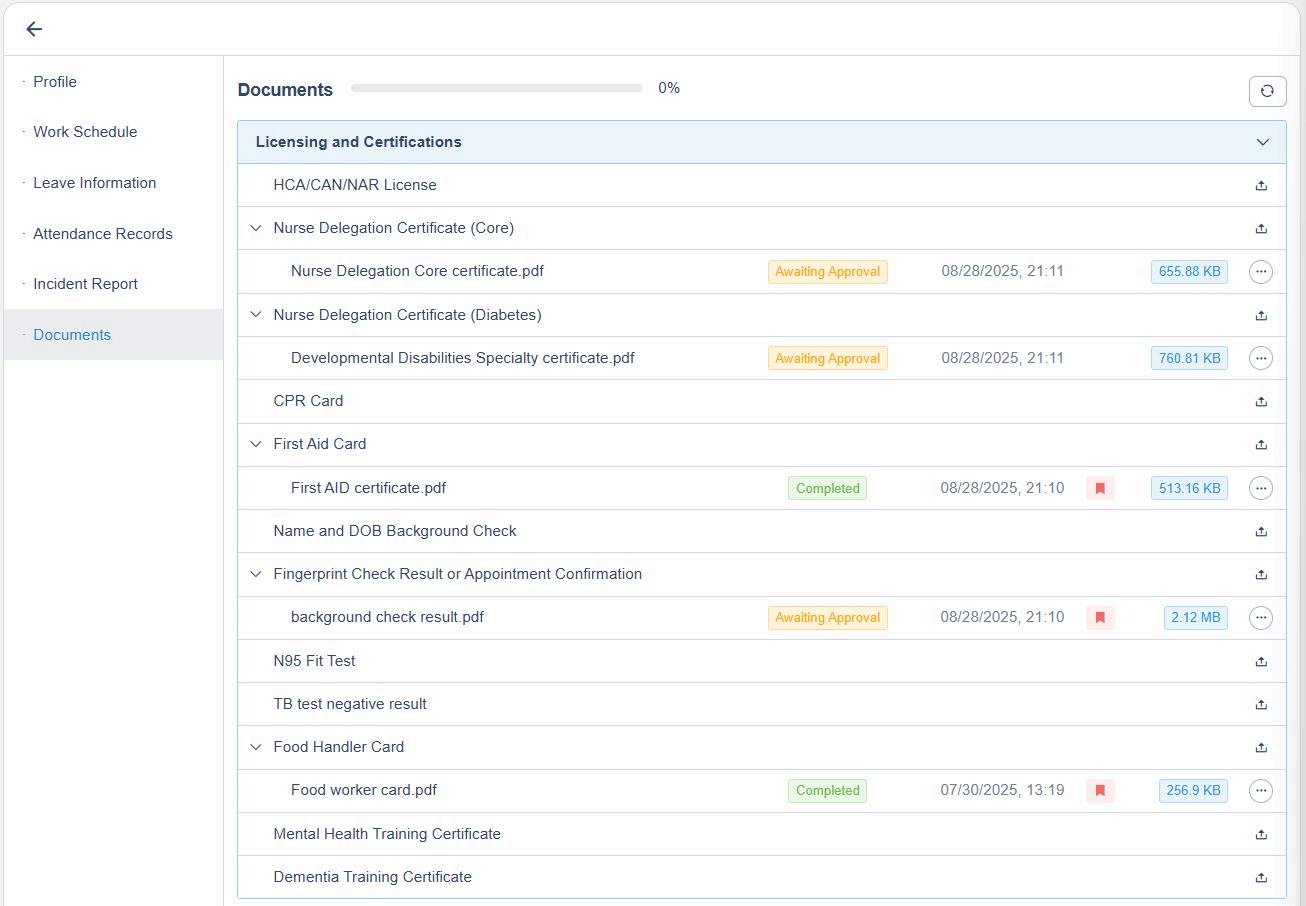
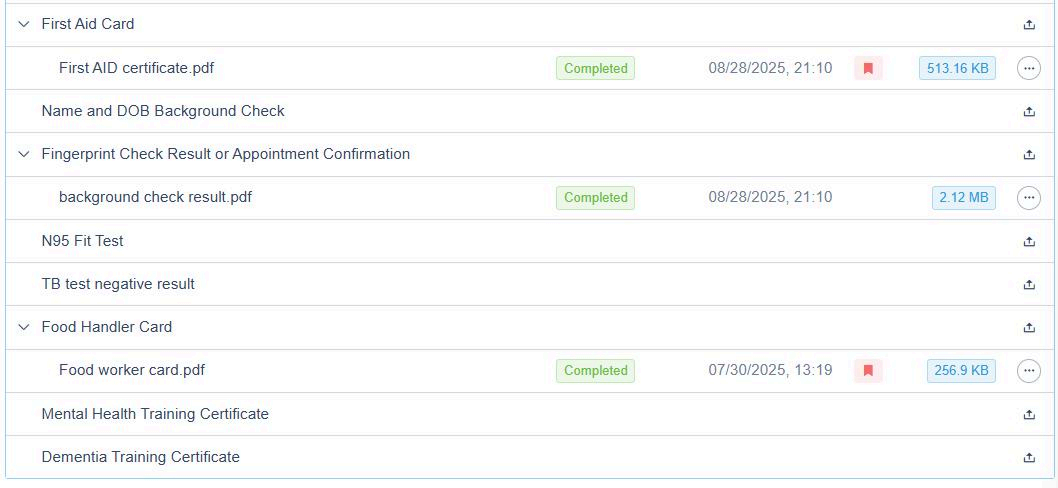
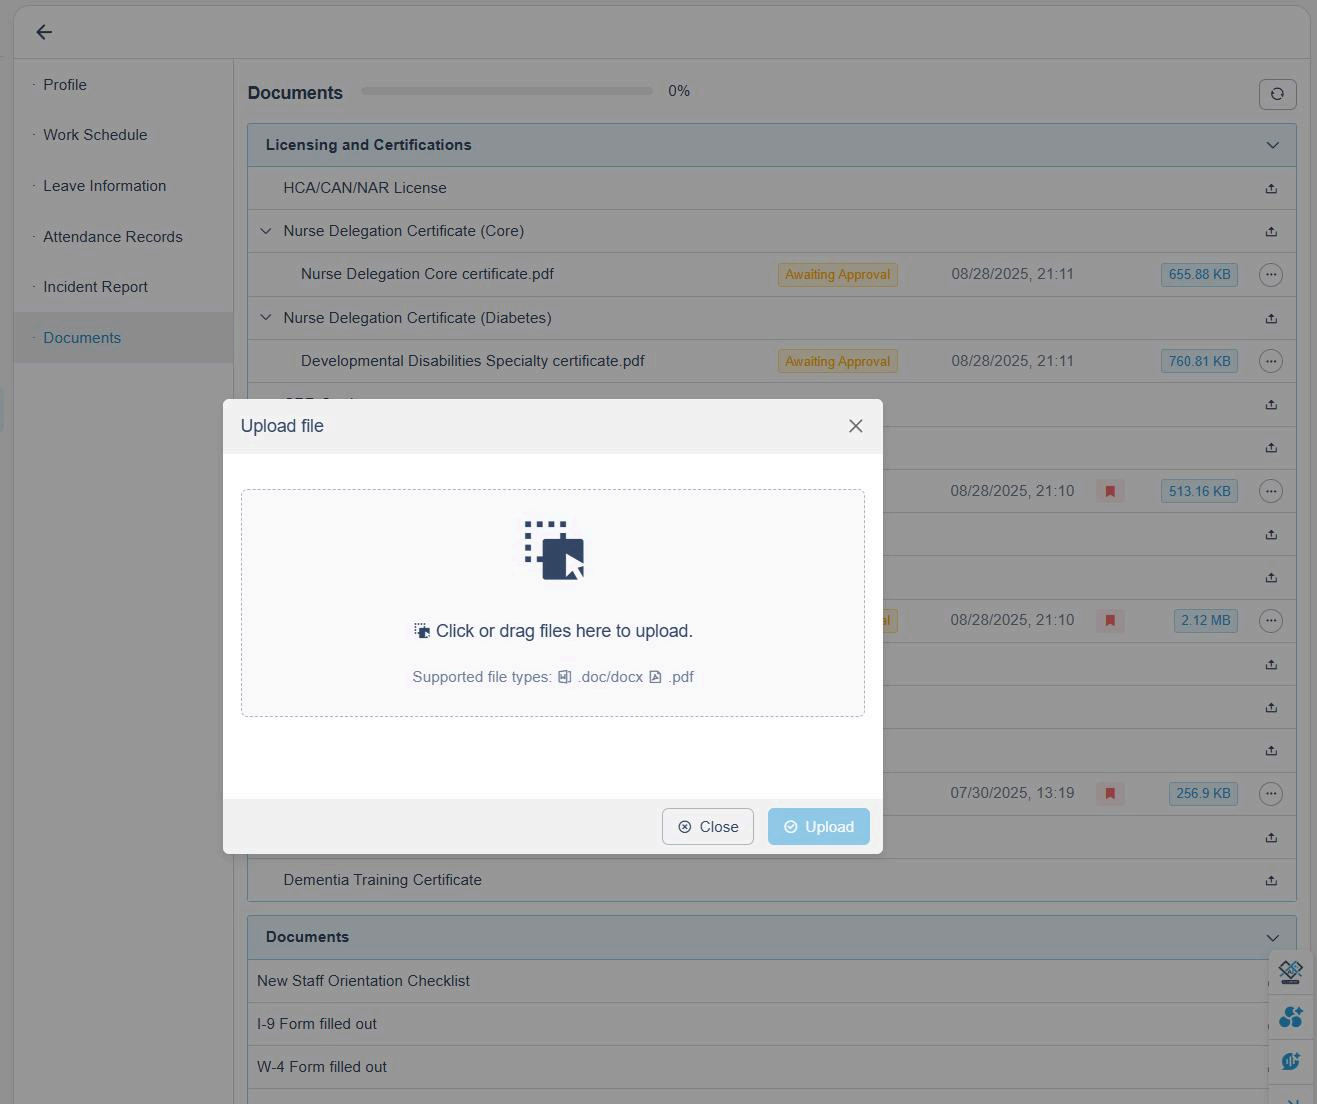
You can upload any of your required documents here. The system will automatically screen them for compliance.
To upload and verify a document:
- Click the Upload button next to the document name.
- Once the file is uploaded to the cloud, the system's AI compliance checker will automatically analyze the document.
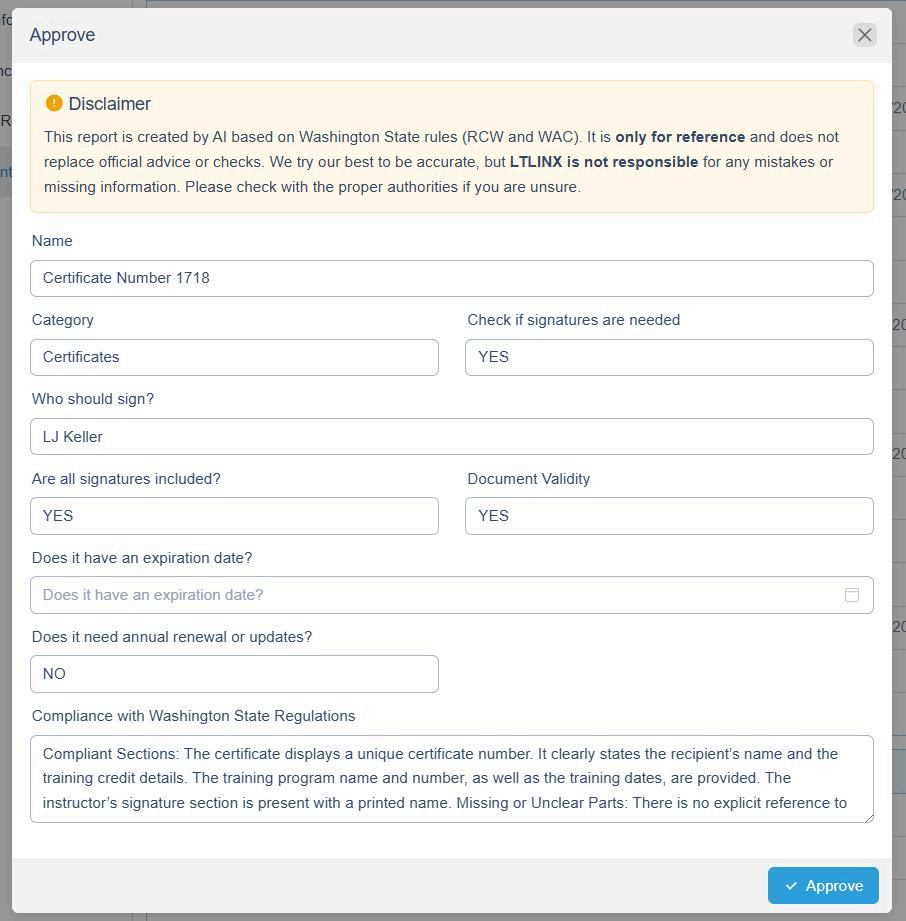
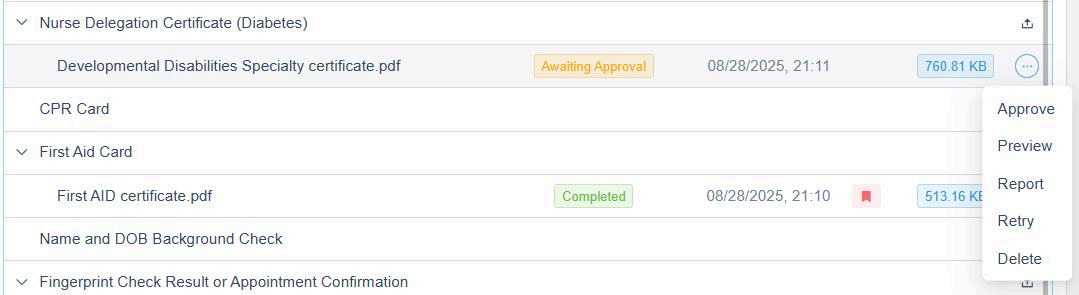
- When the status changes to "Awaiting Approval", it means the AI has finished processing your file.
- Click the three dots (⋯) on the right-hand side and select Approve to open the AI Compliance Report.
The report includes details such as:
- Certificate name and category
- Signature validation
- Expiration date
- Document validity
- Compliance status with Washington State regulations
⚠️ Please carefully review the AI Compliance Report to ensure all information is correct — especially the signature and expiration date.
If the AI does not extract the expiration date automatically, enter it manually. The system will then track and notify you before it expires.
Once a compliance issue is detected, a red flag will appear next to the document name, prompting review.
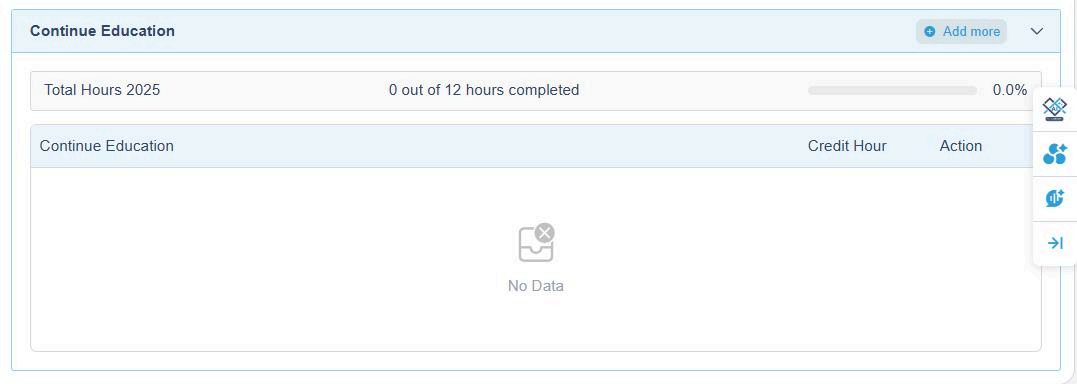
3. Managing Your CE Hours
The system helps you record and monitor your Continuing Education (CE) progress.
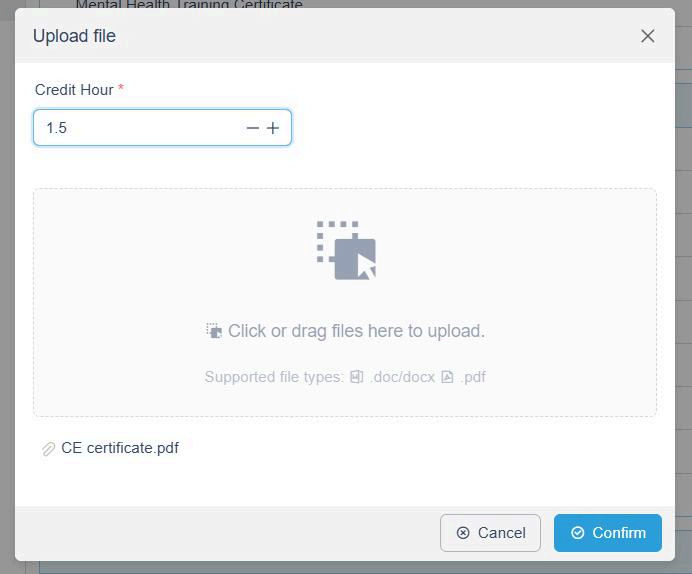
To upload CE certificates:
- Click + Add More in the top-right corner of the Continuing Education section.
- Upload your CE certificate file (PDF, DOCX, etc.).
- Enter the Credit Hours before clicking Confirm.
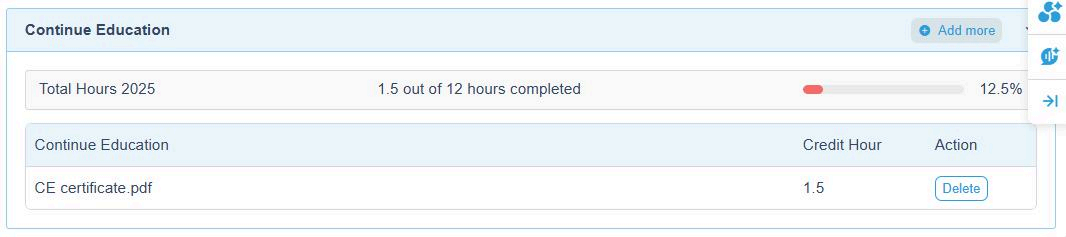
Once uploaded, your CE hours will be automatically tracked in the system.
Example:
If you upload a certificate with 1.5 credit hours, your total will update immediately — e.g., "1.5 out of 12 hours completed."
💡 Tip: Regularly upload your CE certificates to stay on track and avoid compliance gaps.